Final assembly starts today
My friend told me I have free hangar space as long as I'm making good progress, then he said the rate goes up to $10K/month if I poke along. holy crap batman, time is a wastin'.
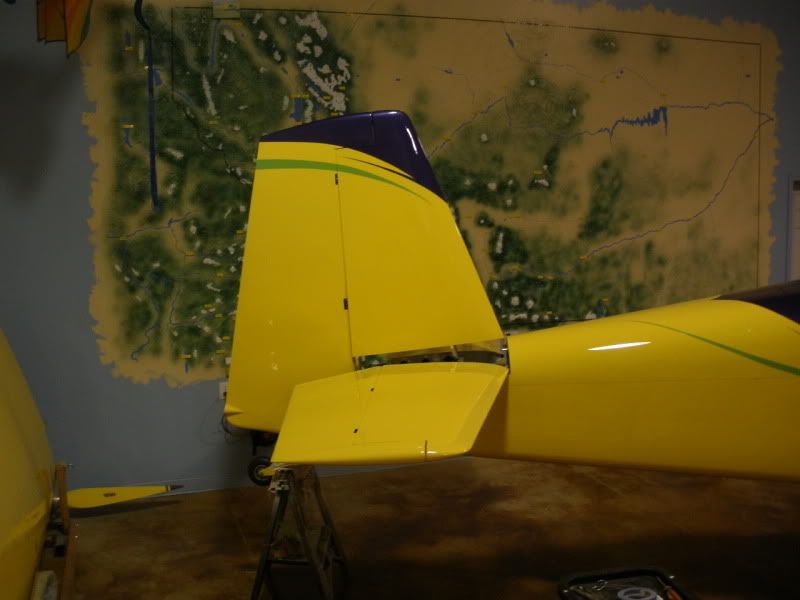
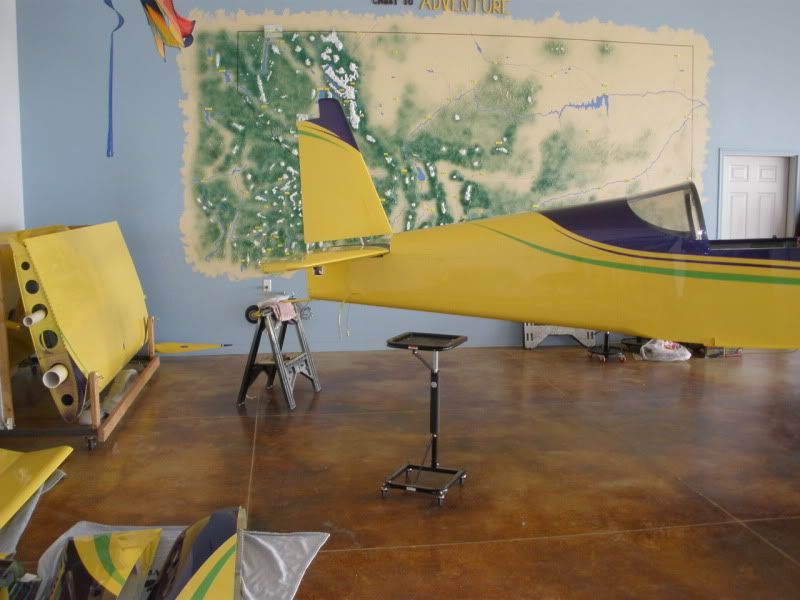
Moved a bunch of stuff and the prints today. Then started putting the tail together.
Brian
Townsend, MT
Townsend, MT
-
- Chief Rivet Banger
- Posts: 4013
- Joined: Thu Oct 14, 2004 8:40 pm
- Location: Baltimore, MD
- Contact:
Now that is a good friend. Fee hanger space and motivation. Keep his palm greased dude.
Spike
Spike
http://www.rivetbangers.com - Now integrating web and mail!
Current Build: 2 years into a beautiful little girl
nicer than my house too. It is my friends hangar home. I have the corner of 50X48 heated floor and access to his attached toolroom. All I do is show up with parts and plans. Hardest part is keeping busy as lots of visitors lately asking lots of questions and slowing things down. yep it's a rough life.
Move In day
Move In day
Brian
Townsend, MT
Townsend, MT
- Wicked Stick
- Class B
- Posts: 1000
- Joined: Wed Feb 09, 2005 10:00 pm
- Location: KEWB
It's really great to finally get to that stage isnt it .
I've been doing my ground run tests and W&B is done, going to calibrate my fuel tanks tomorrow. Ran into an RPM in-op issue last week, but got that fixed today. (TY to Trevor at AFS and Brad at E-magAir.
Enjoy the final assembly and take your time putting it together.
I know what you mean by others being there and talking up a storm when your trying to work. Just make sure they don't distract you into forgetting to assemble something properly.
Nice paint too, careful not to scratch it all up during those times you have to pull the cowls and inspect stuff. I chose not to paint yet until phase 1 is done.
Dave "WS" Rogers
RV-8 (125 hrs & counting)
N173DR
RV-8 (125 hrs & counting)
N173DR
When visitors stop by, I stop working. Too easy to get distracted. My friends will be gone for a week or 3 starting soon, so I'll leave the hangar door down and park my truck somewhere else.
If I hadn't painted I'd probably be in step with you. Getting the details done and readying for 1st flight.
Paint and Prep has added about 2 months to the build. Oh well. Glad it's done. I talked with my paint guy, he said be careful and he has the codes if we need to touch up something. I had to tell a guy today to not lean on the side rail, He had his big belly filled cowboy shirt trying to scratch things up.
I'm thinking about getting some Police crime tape a roping off the area. ....sooner or later I may have to kill someone.
Brian
Townsend, MT
Townsend, MT
- pazmanyflyer
- Class G
- Posts: 28
- Joined: Tue Oct 13, 2009 5:56 pm
- Location: Litchfield Park, Arizona
installed the rudder today and when all torqued down it seemed to stiffen up a bit. Still swings stop to stop but not as free as prior to torquing. the center bearing bolt took a little pressure to slide in, so think I may pull everything off and take another 1/2 turn on it.
How easy should it bang off the stops?
Brian
Townsend, MT
Townsend, MT
Brian,
My rudder and elevators were also quite stiff when I installed them and torqued down the nuts. I backed the nuts off 1/8-1/4 turn or so and everything loosened up nicely. My thoughts on why this occurred was I overtorqued the nuts, causing the center of the rod end bearing to expand slightly outward, causing it to rub against the casing of the rod end bearing.
hydroguy2 wrote:installed the rudder today and when all torqued down it seemed to stiffen up a bit. Still swings stop to stop but not as free as prior to torquing. the center bearing bolt took a little pressure to slide in, so think I may pull everything off and take another 1/2 turn on it.
How easy should it bang off the stops?
Mike Bullock
http://www.rvplane.com
RV-7 | Superior IO-360 | Whirlwind 200RV
Garmin GTN650 | GRT Dual Sport SX EFIS
Status: FLYING!
http://www.rvplane.com
RV-7 | Superior IO-360 | Whirlwind 200RV
Garmin GTN650 | GRT Dual Sport SX EFIS
Status: FLYING!
I went back to the hangar and messed with the rudder. I didn't loosen any hardware but it still seemed to free up. Kinda' wonder if I don't just have a bearing with some overspray on it. I went ahead and hooked up the cables, then tossed on the elevators. No scratches, hooray!
When I was readying everything for paint I kept looking at the Vans tailwheel fork thinking, no way was it staying. So sent off for a Screaming Eagle tailfork. I had purchased a Rocket Steering link years ago. Time for both of those to finally join the party.
Brian
Townsend, MT
Townsend, MT
-
- Class C
- Posts: 625
- Joined: Sat Nov 13, 2004 8:37 pm
- Location: Sartell MN
Looking great Brian!!! I really like your tail wheel and set up. Do you have a wheel pant that will eventually go on the tail wheel? I hope you get it flying soon! To bad you can't fly to the MN Wing of Van's Airforce picnic this Saturday That is always a good time and there will be a lot of beautiful RV's there.
Thanks everybody. hopefully you guys don't get tired of seeing the updates. I post them for some friends who aren't registered members but visit here and/or VAF. Also it gives me a motivational boost to keep progress going, hope it does for other builders also.
Bob, no tail fairing planned. I'll be on a lot of grass strips, so went for the clearance. I did oversized mains also
Brian
Townsend, MT
Townsend, MT
-
- Chief Rivet Banger
- Posts: 4013
- Joined: Thu Oct 14, 2004 8:40 pm
- Location: Baltimore, MD
- Contact:
Keep em coming dude. They are very motivational!
Spike
Spike
http://www.rivetbangers.com - Now integrating web and mail!
Current Build: 2 years into a beautiful little girl
- Joe Parish
- Class D
- Posts: 311
- Joined: Wed Apr 21, 2010 3:42 pm
- Location: Sioux Falls SD
- TomNativeNewYorker
- Class D
- Posts: 439
- Joined: Tue Mar 21, 2006 9:19 pm
- Location: KSAV