Cowl Hinge Pins -- From the inside
Posted: Thu Dec 18, 2008 11:23 am
A few weeks ago, Mike Reagan was nice enough to fly up to KDMW to show me how he inserts the cowl hinge pins from inside the fuselage. The advantage of inserting the cowl hinges from the inside is you don't need any cutouts on the front of the cowl where most people insert the hinge pins through.
This was one of the easier modifications/deviations I have done, not only in terms of time, but also money. It only took about $20 in parts and 4 hours in time.
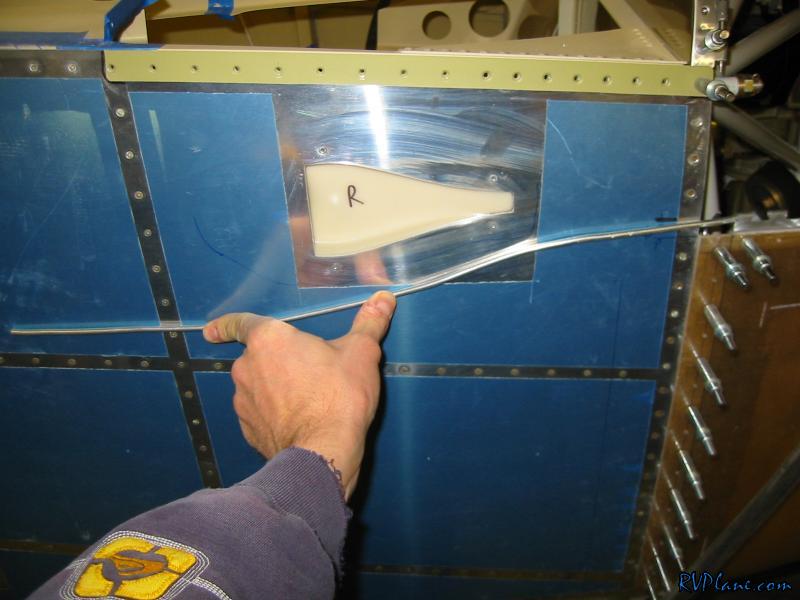
So the idea is is to use 3/16" aluminum tube (ACS p/n 03-40300, $0.40/ft) to guide the pin from the F-902 bulkhead, around the NACA duct and to the firewall. There will be a hole in the firewall where the tubing goes through, aligning it up with the hinge eyelets.
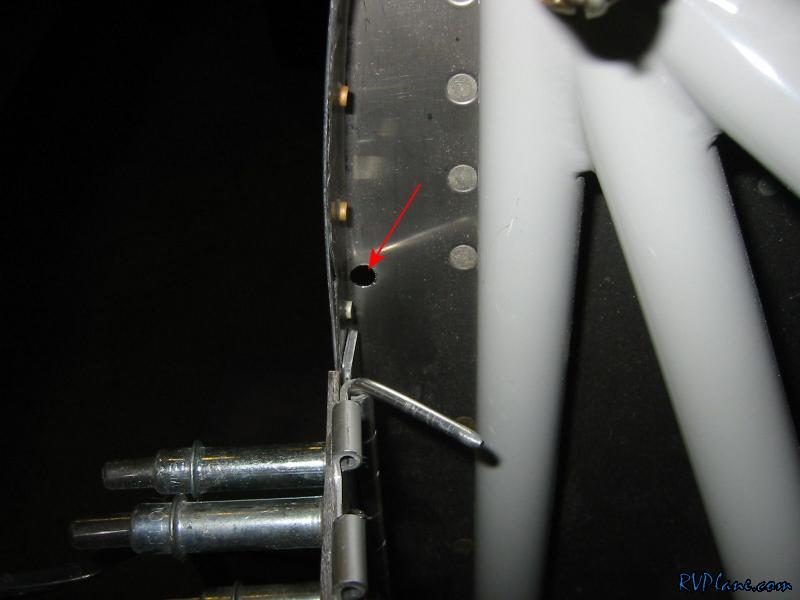
Here is a 7/32" hole in the firewall. I started with a #40 hole for the first alignment, then enlarged it. The hole needed to be larger than 3/16" because at 3/16", the stainless firewall rubbed against the soft aluminum tubing very aggressively. I might make the hole larger if I can determine if a plastic snap bushing can be used here.
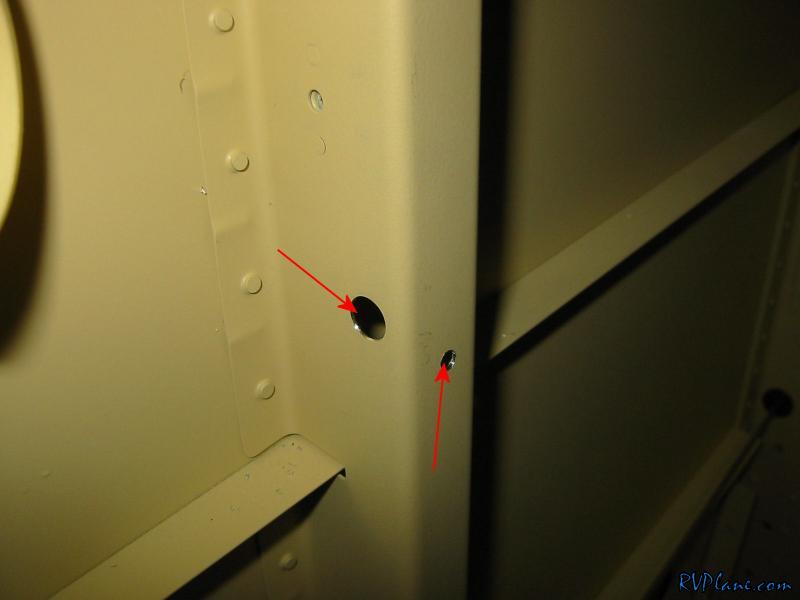
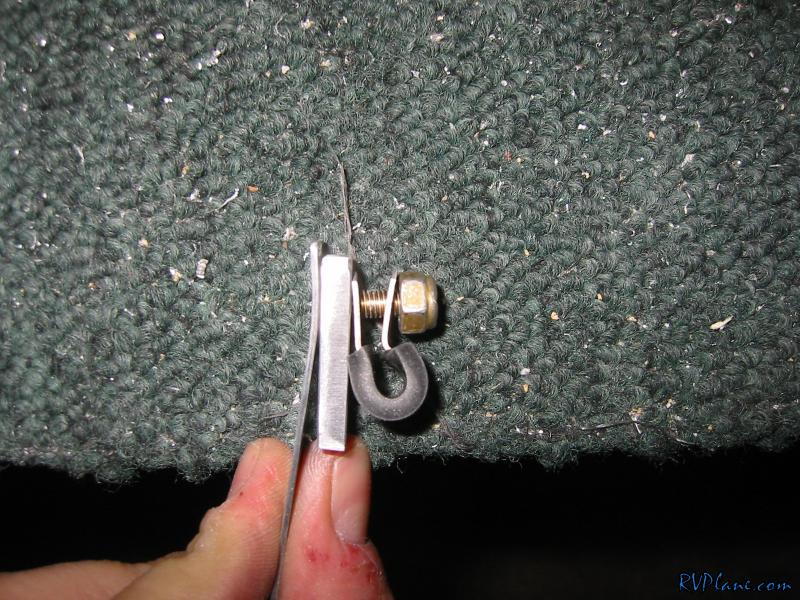
Next up was adding some holes to the F-902 bulkhead. I wanted to put the tubing on the inside of the F-902 to hide it a little. Mike Reagan had his on the outside, which is without a doubt easier to do. However, I am pretty (really) anal, so I always make things more difficult. The 3/8" hole on the forward side of the F-902 is where the 3/16" tubing goes through. Its center is 13/32" from the inboard edge of the F-902. This needed to be offset outboard somewhat to avoid conflicting with the vent tube. The other hole (#12)on the inboard edge of the F-902 is centered front-to-back on the F-902 and is set 1/2" down from the centerline of the 1/8" hole. This hole is for an adel clamp to sit inside of the F-902 bulkhead.
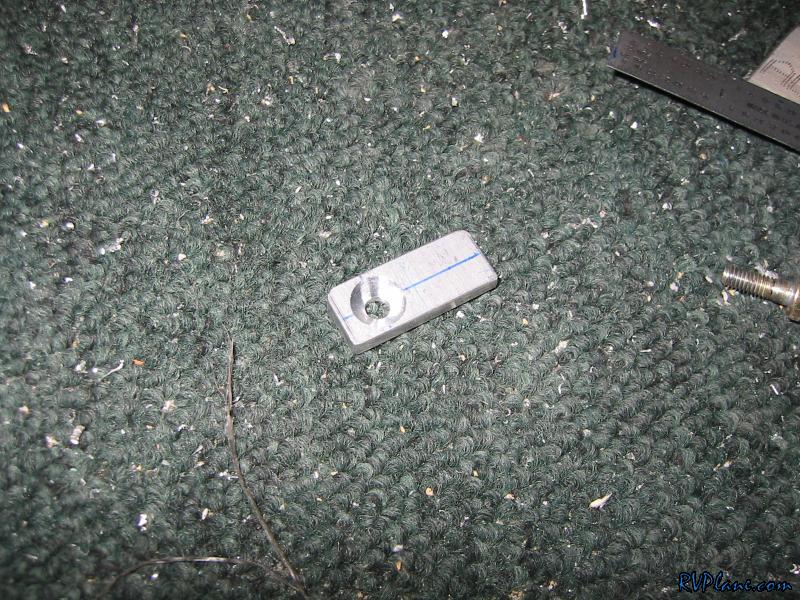
Since I am anal, I wanted a countersunk #10 screw (AN509-10R12 I believe) to be on the F-902 so the inboard surface is flush. I also needed to make a 3/16" spacer that would go between the F-902 and the adel clamp to offset the adel clamp outboard enough to center it with the hole I made (to clear the vent line). I countersunk this #12 hole to align with the dimple I put in the F-902.
I just slapped this together to demonstrate how it will all fit together when it is attached.
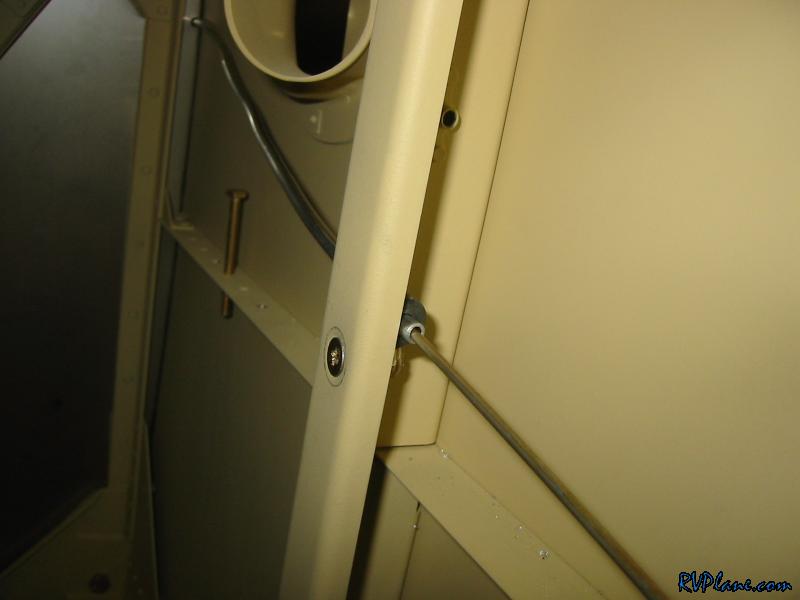
After assembling it all, here is how the inside looks.
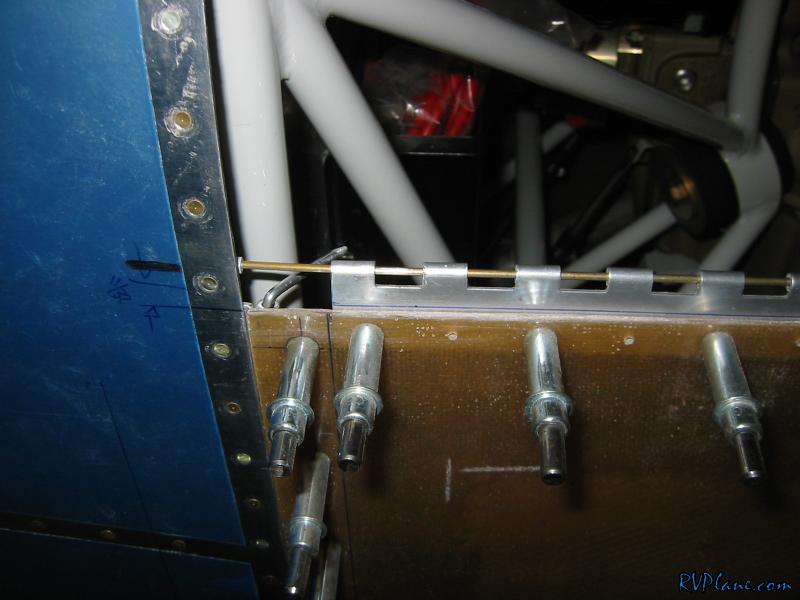
And here is the forward side. One thing to note here is the eyelet on the bottom cowl needs to be closest to the firewall. Since the 3/16" tubing and the hinges don't align perfectly, you need to get the hinge pin started manually by helping the pin in that first eyelet. If you made the first eyelet on the top of the cowl, it would be much harder to get it aligned.
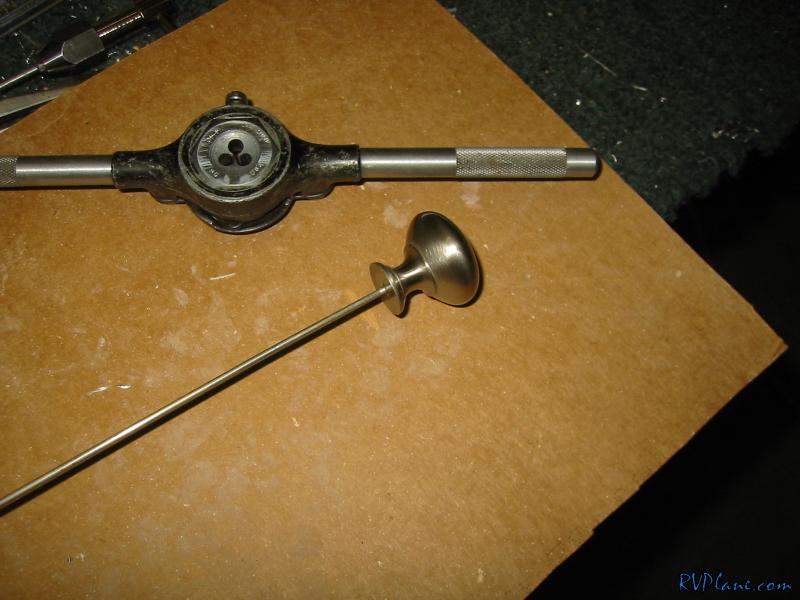
OK, now to make this a little more fancy. I bought some knobs from the hardware store to put on the end of the hinge pins. There were pre-tapped for some larger screws. However, they aren't tapped all the way through. There is about 1/8" worth of material at the end of the pre threaded hole that I drilled out and tapped to a 4-40 hole.
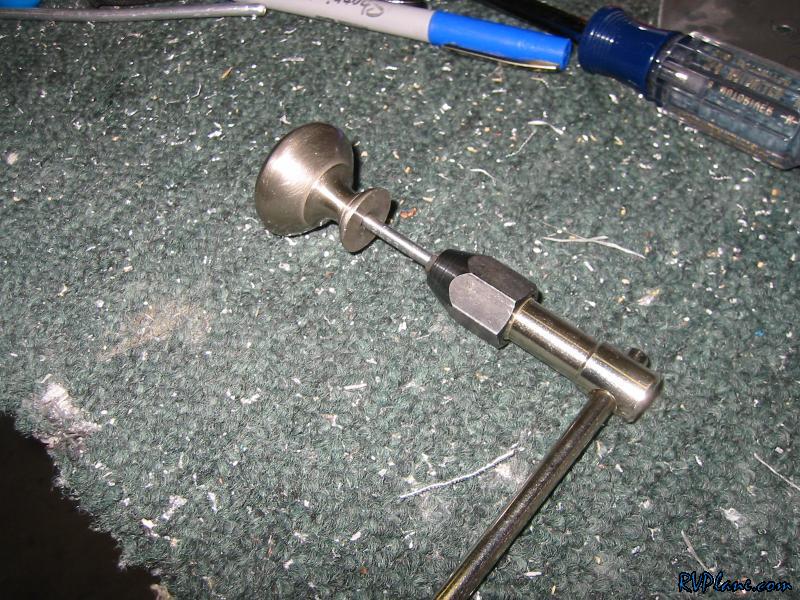
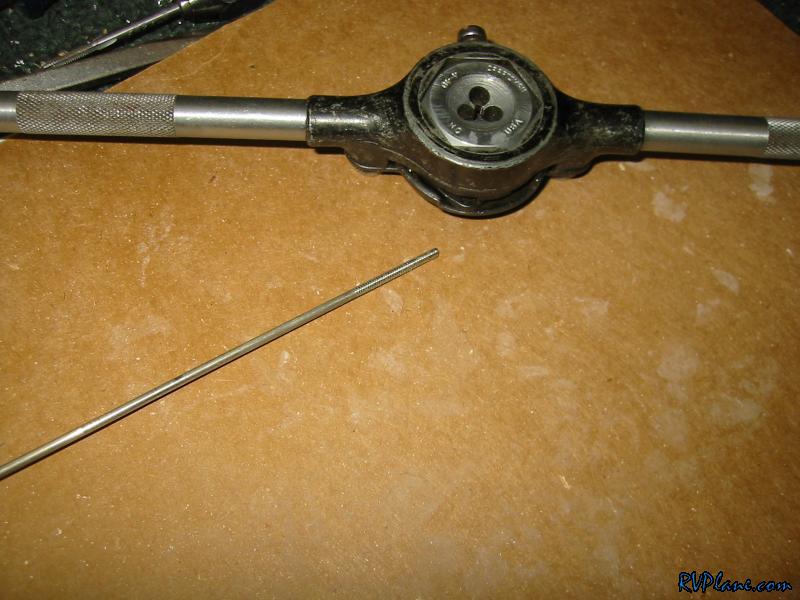
Next I threaded the end of the hinge pin to a 4-40 also.
So I have a tapped knob and a threaded pin. I wonder where this is going? Yup, I screwed the two of them together. It is really solid, but I will epoxy them together later on, as they do want to spin freely. Plus I think the knob is only threaded for about 1/8" or so since it is hollow on the end.
The end result looks freakin' awesome. I still have a little work to do to finish it up, but it's pretty much DONE!

This was one of the easier modifications/deviations I have done, not only in terms of time, but also money. It only took about $20 in parts and 4 hours in time.
So the idea is is to use 3/16" aluminum tube (ACS p/n 03-40300, $0.40/ft) to guide the pin from the F-902 bulkhead, around the NACA duct and to the firewall. There will be a hole in the firewall where the tubing goes through, aligning it up with the hinge eyelets.
Here is a 7/32" hole in the firewall. I started with a #40 hole for the first alignment, then enlarged it. The hole needed to be larger than 3/16" because at 3/16", the stainless firewall rubbed against the soft aluminum tubing very aggressively. I might make the hole larger if I can determine if a plastic snap bushing can be used here.
Next up was adding some holes to the F-902 bulkhead. I wanted to put the tubing on the inside of the F-902 to hide it a little. Mike Reagan had his on the outside, which is without a doubt easier to do. However, I am pretty (really) anal, so I always make things more difficult. The 3/8" hole on the forward side of the F-902 is where the 3/16" tubing goes through. Its center is 13/32" from the inboard edge of the F-902. This needed to be offset outboard somewhat to avoid conflicting with the vent tube. The other hole (#12)on the inboard edge of the F-902 is centered front-to-back on the F-902 and is set 1/2" down from the centerline of the 1/8" hole. This hole is for an adel clamp to sit inside of the F-902 bulkhead.
Since I am anal, I wanted a countersunk #10 screw (AN509-10R12 I believe) to be on the F-902 so the inboard surface is flush. I also needed to make a 3/16" spacer that would go between the F-902 and the adel clamp to offset the adel clamp outboard enough to center it with the hole I made (to clear the vent line). I countersunk this #12 hole to align with the dimple I put in the F-902.
I just slapped this together to demonstrate how it will all fit together when it is attached.
After assembling it all, here is how the inside looks.
And here is the forward side. One thing to note here is the eyelet on the bottom cowl needs to be closest to the firewall. Since the 3/16" tubing and the hinges don't align perfectly, you need to get the hinge pin started manually by helping the pin in that first eyelet. If you made the first eyelet on the top of the cowl, it would be much harder to get it aligned.
OK, now to make this a little more fancy. I bought some knobs from the hardware store to put on the end of the hinge pins. There were pre-tapped for some larger screws. However, they aren't tapped all the way through. There is about 1/8" worth of material at the end of the pre threaded hole that I drilled out and tapped to a 4-40 hole.
Next I threaded the end of the hinge pin to a 4-40 also.
So I have a tapped knob and a threaded pin. I wonder where this is going? Yup, I screwed the two of them together. It is really solid, but I will epoxy them together later on, as they do want to spin freely. Plus I think the knob is only threaded for about 1/8" or so since it is hollow on the end.
The end result looks freakin' awesome. I still have a little work to do to finish it up, but it's pretty much DONE!