
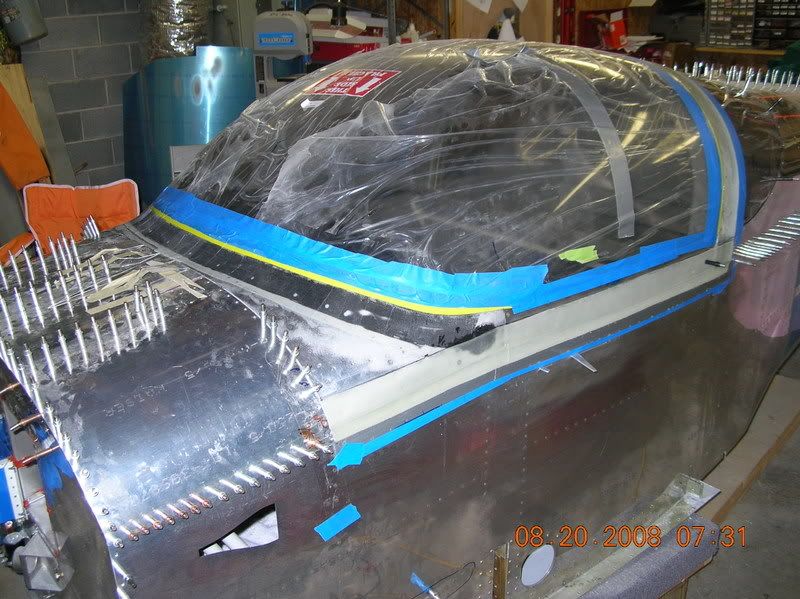
I haven't messed with weather sealing yet, but the canopy/frame REALLY stiffens up after all the 'glass fairing work is done. The rear latches will really help a lot as well as far as fit goes.
Your pics are interesting to me...I've been looking at different thickness's and types to install down the road sometime.
Status Brantel #72823
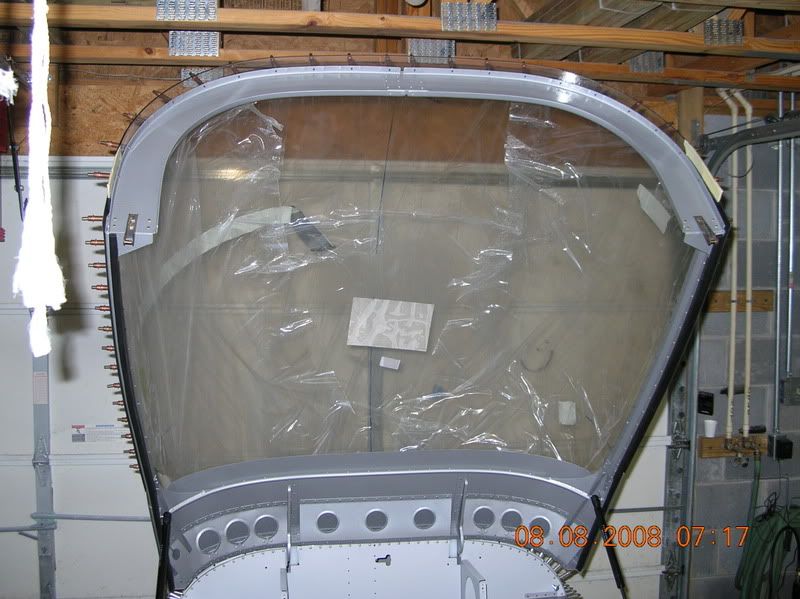
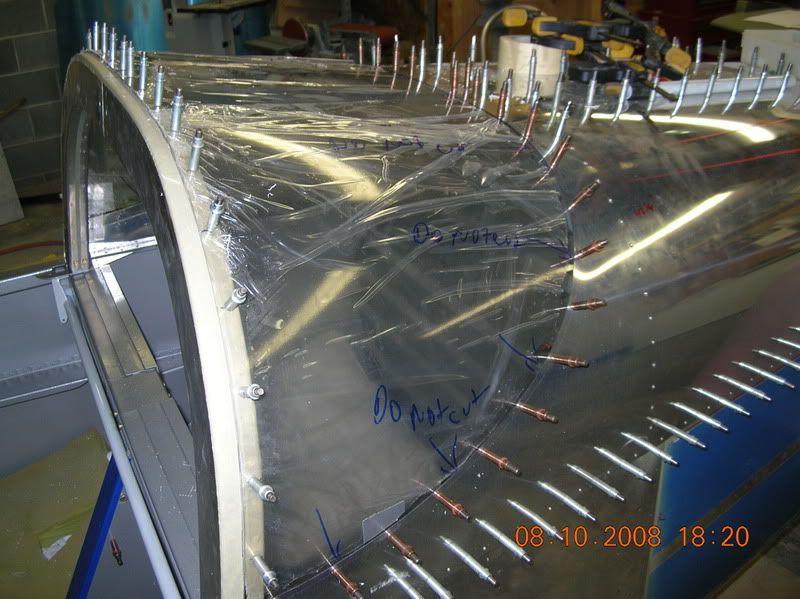
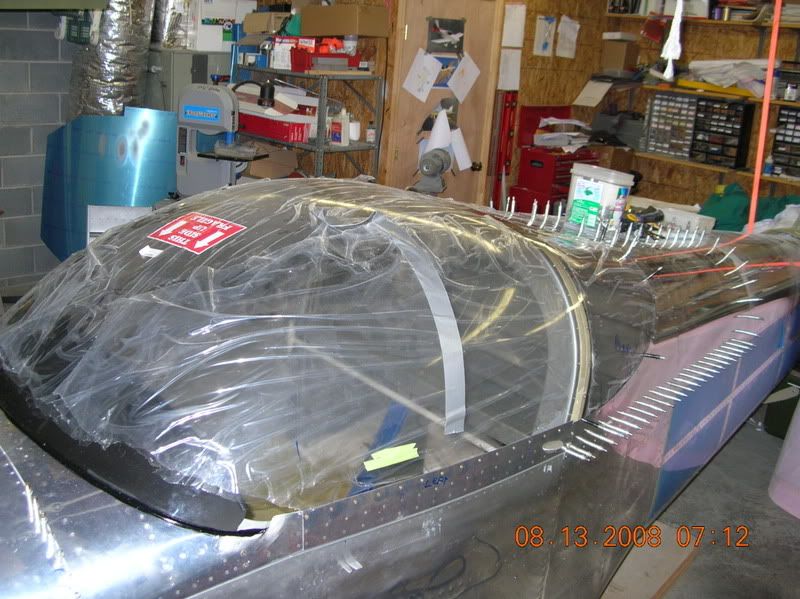
Got several things done on the canopy this weekend.
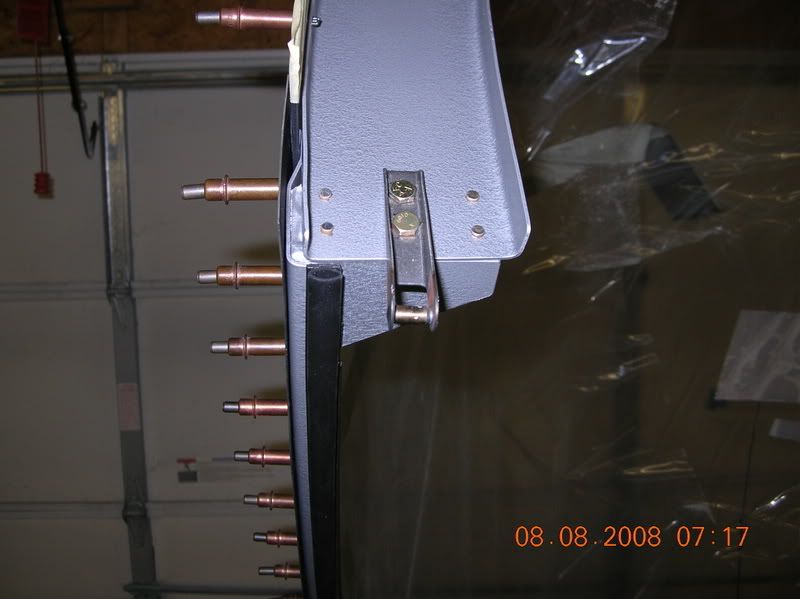
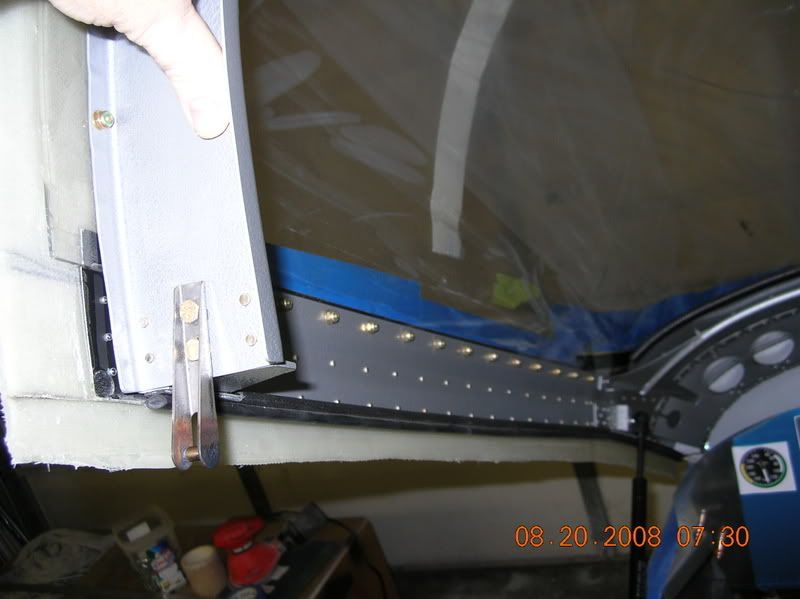
Installed the rear latch fingers, do yourself a favor and just remove the rollbar to make this a no stress event. I started not to but decided what the heck and it took all the stress out of this job:
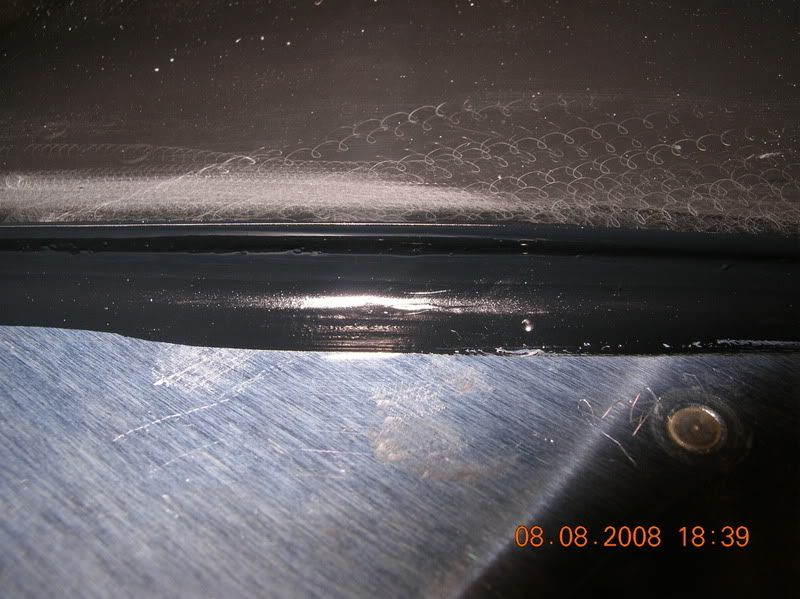
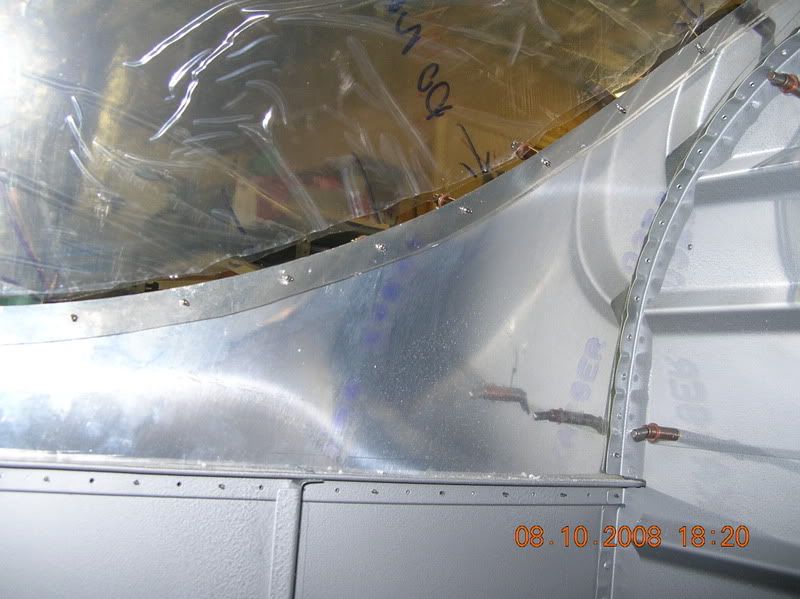
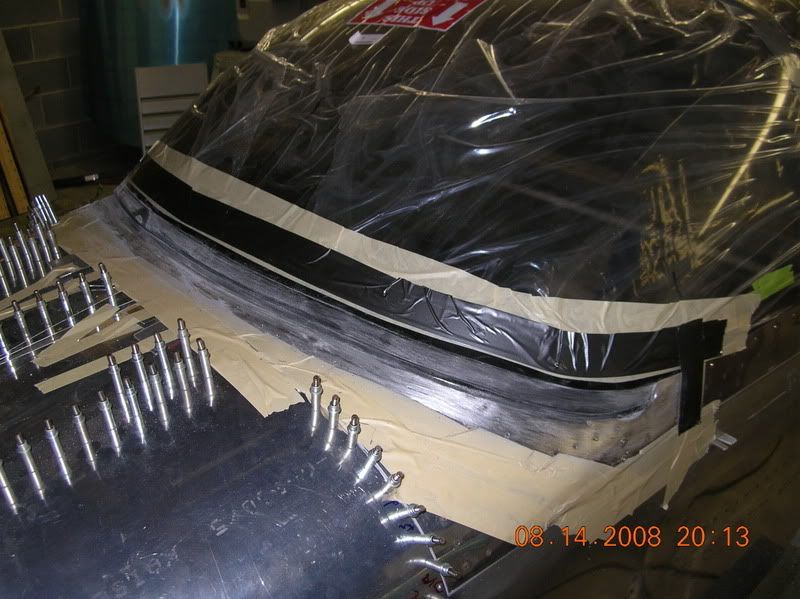
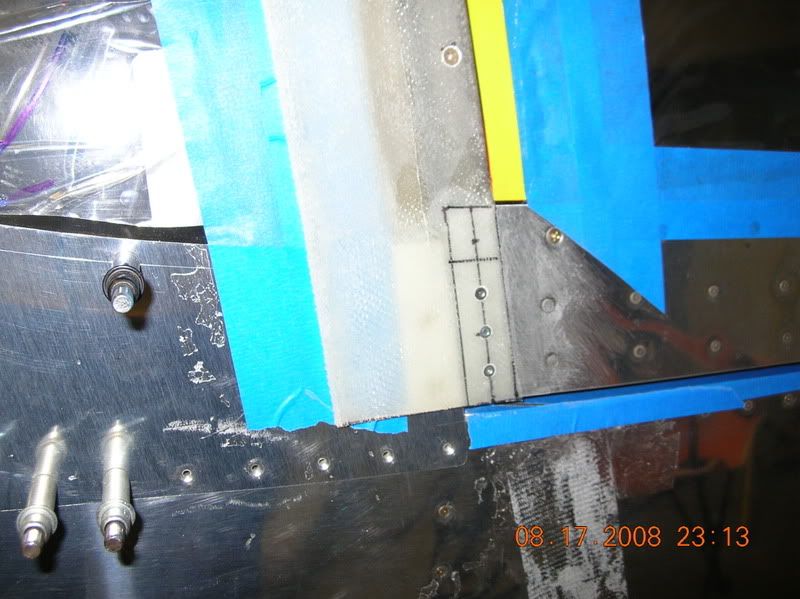
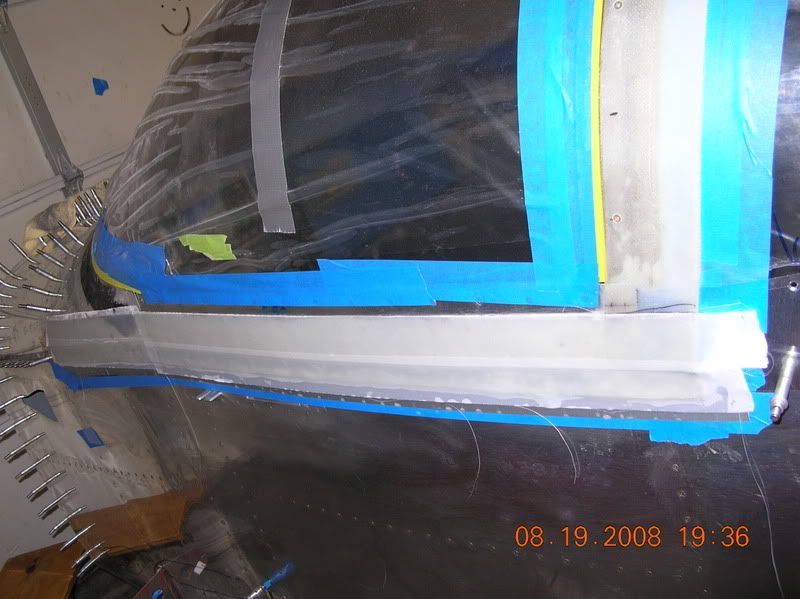
I glued the front of my canopy down to the canopy skin with some black urethane window sealant from Autozone. I did this to give the front of the canopy a perfectly consistent surface to support itself on. After riveting and screwing the glass to the frame, I had some gaps under the plexi in the front. I just calked this stuff from the outside and then took my finger and made a fillet. On the inside I got a nice rolled bead all around where the plexi meets the skin. Really made it look finished from the inside. Next is the flox then the glass in this area.
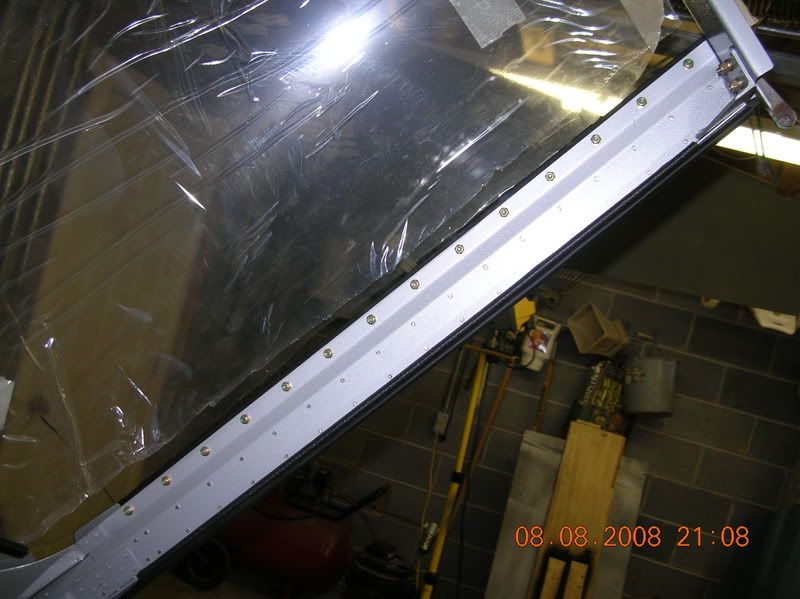
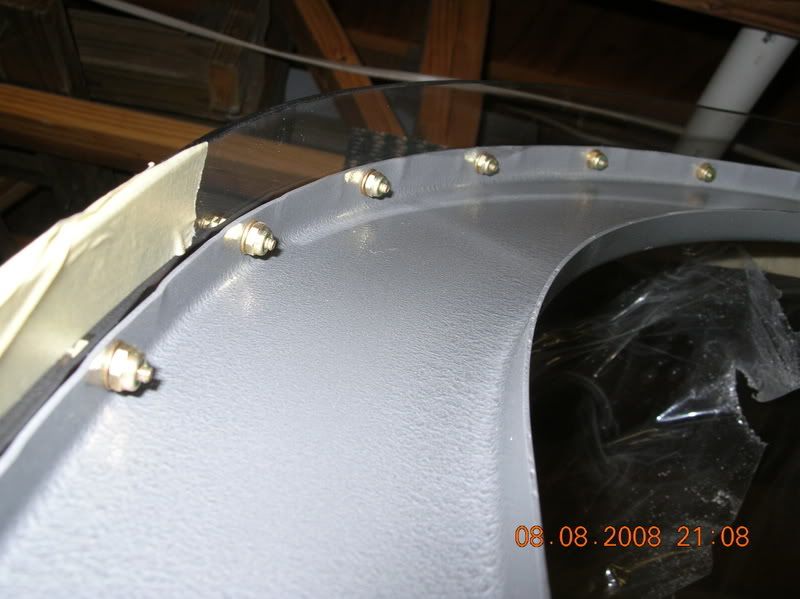
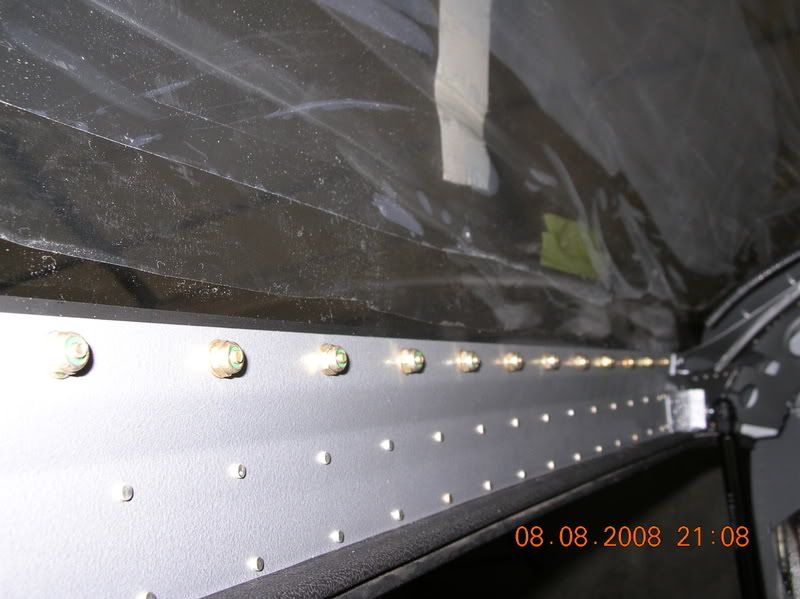
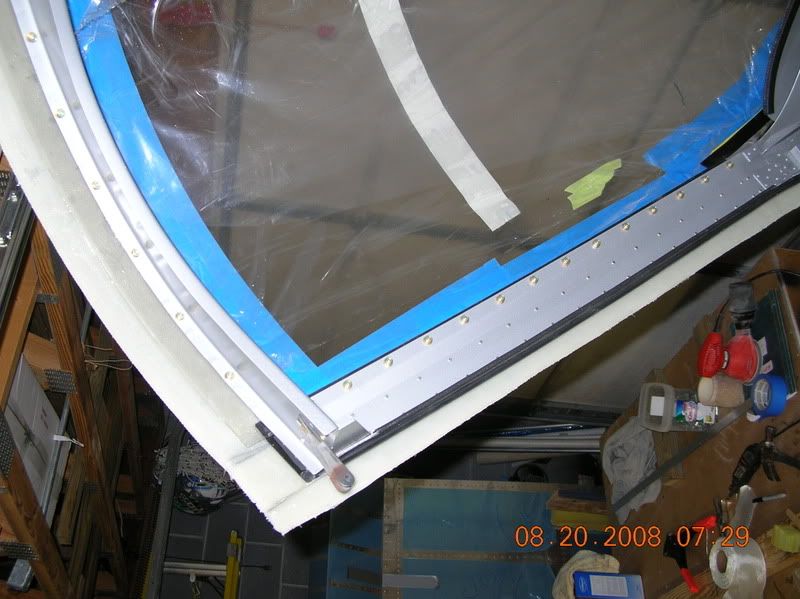
Finished all the screws all around the frame. I kinda like the techi look of the hardware contrasting with the paint.
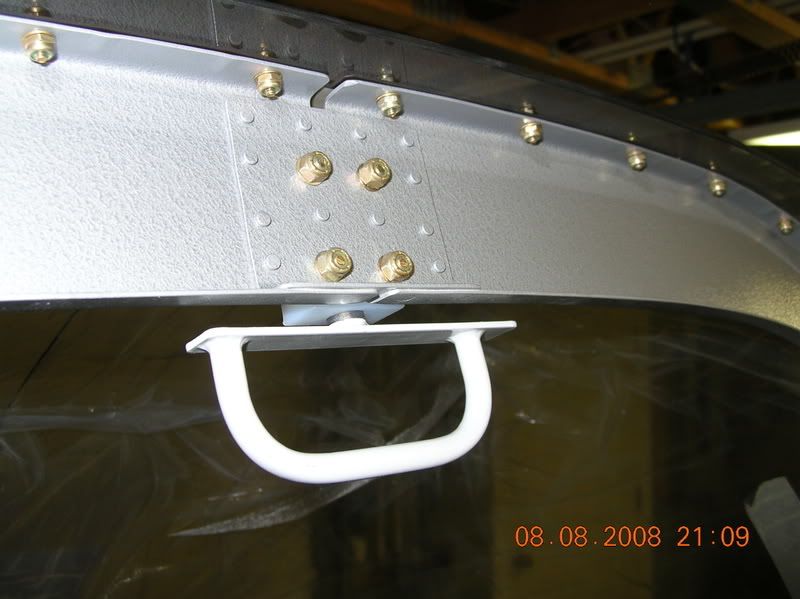
Installed the rear safety latch/handle. This was super easy to do and it works great.
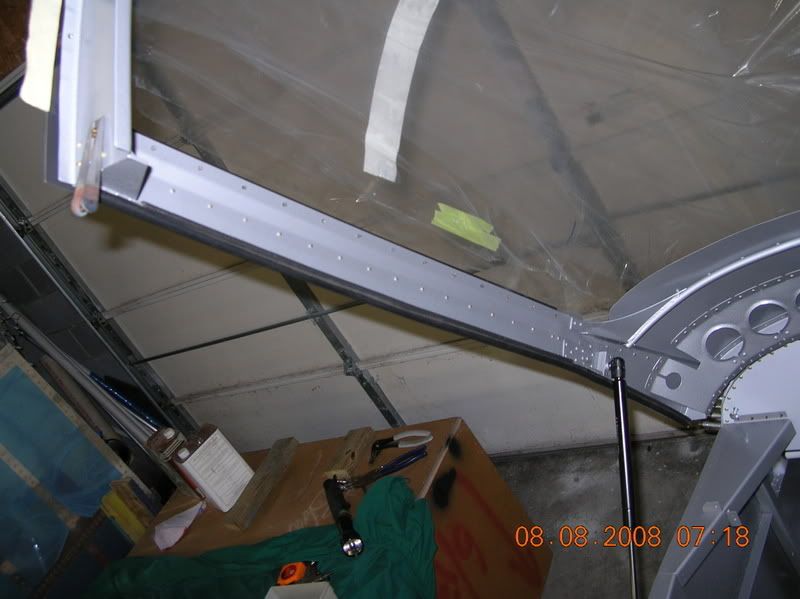
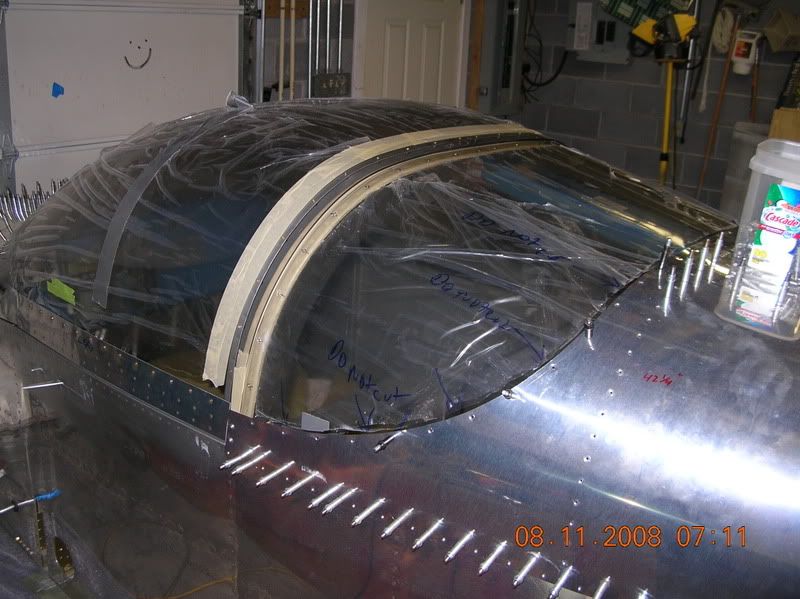
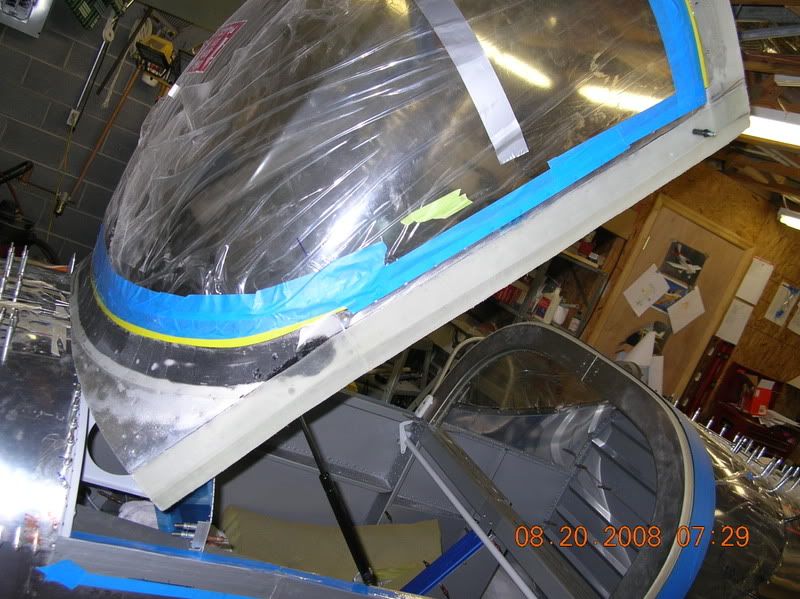
Trimmed, fit, edge finished, drilled, countersunk, drilled and tapped the rollbar and temp. attached the rear window. Have a little more sanding to open up the gap between the front and rear so it will close all the way but for the most part, all the plexi cutting is officially done! So far no cracks!
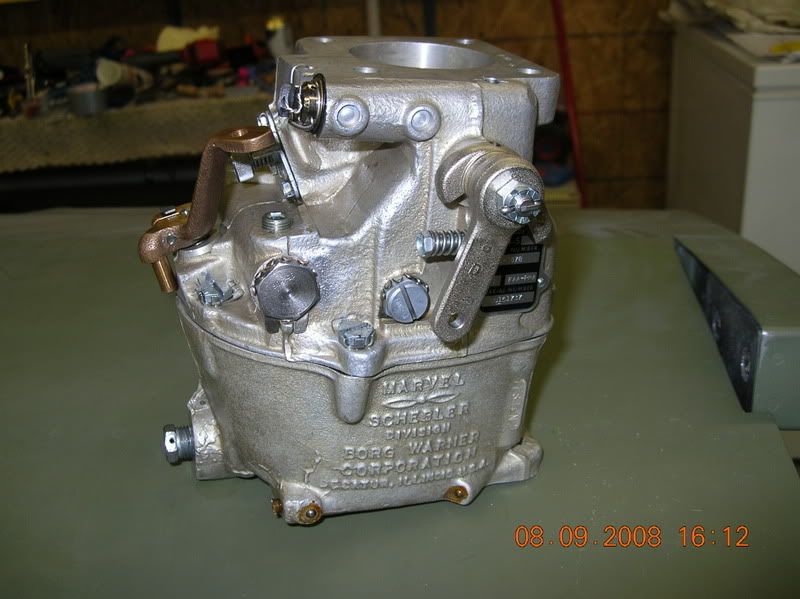
Also got my carb in the mail that I bought from another RV'er all the way in Washington state.
Installed the rear latch fingers, do yourself a favor and just remove the rollbar to make this a no stress event. I started not to but decided what the heck and it took all the stress out of this job:
I glued the front of my canopy down to the canopy skin with some black urethane window sealant from Autozone. I did this to give the front of the canopy a perfectly consistent surface to support itself on. After riveting and screwing the glass to the frame, I had some gaps under the plexi in the front. I just calked this stuff from the outside and then took my finger and made a fillet. On the inside I got a nice rolled bead all around where the plexi meets the skin. Really made it look finished from the inside. Next is the flox then the glass in this area.
Finished all the screws all around the frame. I kinda like the techi look of the hardware contrasting with the paint.
Installed the rear safety latch/handle. This was super easy to do and it works great.
Trimmed, fit, edge finished, drilled, countersunk, drilled and tapped the rollbar and temp. attached the rear window. Have a little more sanding to open up the gap between the front and rear so it will close all the way but for the most part, all the plexi cutting is officially done! So far no cracks!
Also got my carb in the mail that I bought from another RV'er all the way in Washington state.
Last edited by Brantel on Mon Aug 11, 2008 10:20 am, edited 1 time in total.
Brantel (Brian Chesteen),
RV12-IS, #121606, N912BC - Building Now!
RV10, #41942, N????? - Project Sold
RV-7/TU, #72823, N159SB - SOLD
RV12-IS, #121606, N912BC - Building Now!
RV10, #41942, N????? - Project Sold
RV-7/TU, #72823, N159SB - SOLD
-
aparchment

- Class C
- Posts: 522
- Joined: Tue Nov 15, 2005 9:43 pm
Way to go!
Looking great Brian! Keep up that pace. You're inspiring us all.
Antony
Antony
-
RV7Factory

- Beanpolt
- Posts: 522
- Joined: Fri May 20, 2005 2:28 pm
- Location: Livermore, CA
Re: Way to go!
Ditto!aparchment wrote:Looking great Brian! Keep up that pace. You're inspiring us all.
Antony

This canopy work seems to take forever. I think I have more time in this so far than I had in both fuel tanks. Nothing too hard, just time consuming! And I have not even done the fiberglass in front yet
I will call everything done except the front fairing and maybe a targa strip. I do not want to perm. mount the rear window yet so that will wait. I still need to paint the rollbar and the rollbar to bulkhead brace and the underside of the aft top skin. I am waiting to rivet the aft top skin on for a little longer.
I installed a handle mostly copied from Jeff... Thanks Jeff!
I did not put one on the co-pilot side because several people warned me that that is asking for trouble and for the most part I would rather be the one doing the opening and closing.
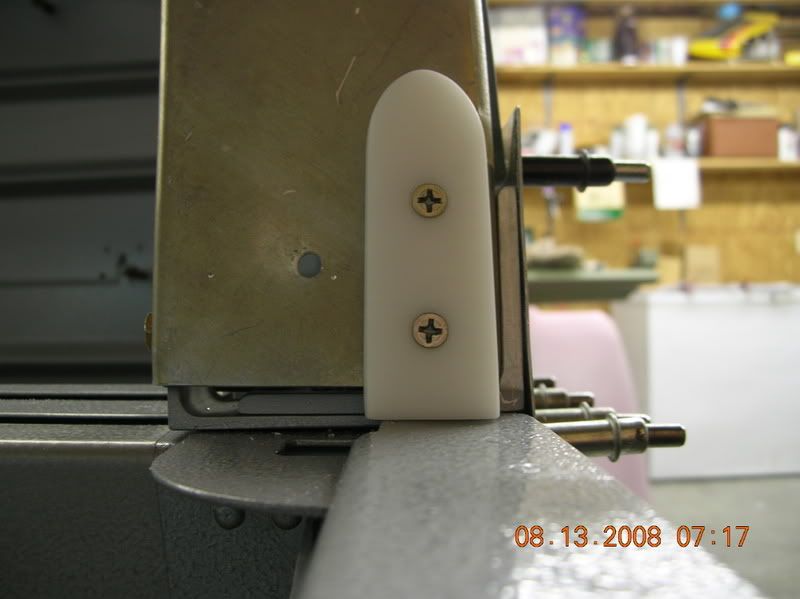
I also added these Delrin guides very similar to Jeff's....Thanks Jeff!
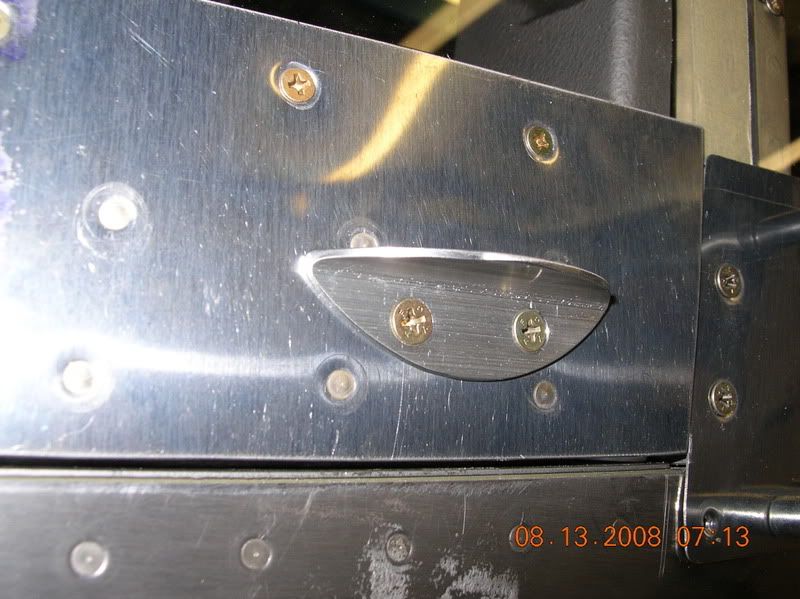
On the co-pilot side for whatever reason I had to add a shim behind it because it was comming up a little short in thickness and it was possible for the latch finger to sit on top/front of it instead of slide down the side like it is suppose to. Once I added this spacer, there is no way to get the finger to catch on the top/front.
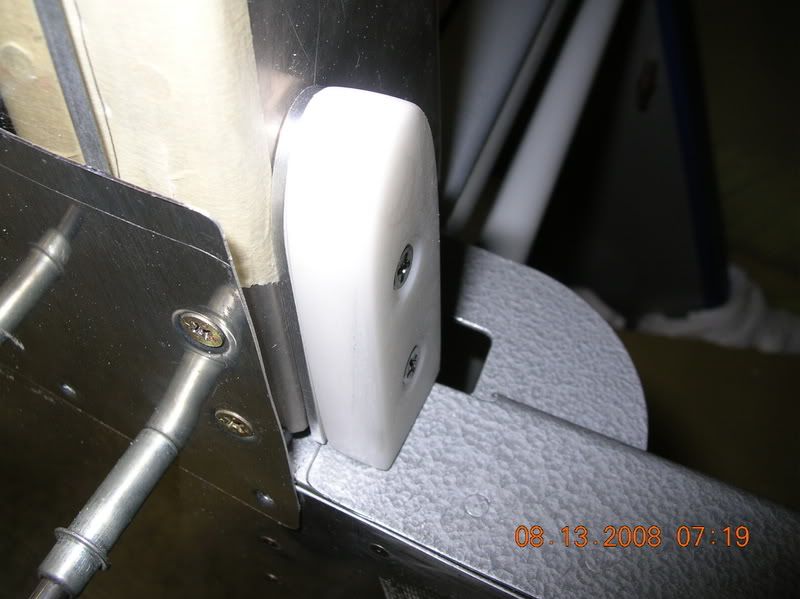
These things really seem like they will do a good job to help protect the corners of the plexi and the paint around the latch finger holes and to stop paint from being scraped off the rollbar.
Jeff says that there is no way that you could damage the interface areas with these. Well almost, if you really were not paying attention to what you were doing, you could still do some damage but not nearly as easy as if you did not have these guides.
Everyone says the whole thing will stiffen up more once the fiberglass is on.... we shall see
I will call everything done except the front fairing and maybe a targa strip. I do not want to perm. mount the rear window yet so that will wait. I still need to paint the rollbar and the rollbar to bulkhead brace and the underside of the aft top skin. I am waiting to rivet the aft top skin on for a little longer.
I installed a handle mostly copied from Jeff... Thanks Jeff!
I did not put one on the co-pilot side because several people warned me that that is asking for trouble and for the most part I would rather be the one doing the opening and closing.
I also added these Delrin guides very similar to Jeff's....Thanks Jeff!
On the co-pilot side for whatever reason I had to add a shim behind it because it was comming up a little short in thickness and it was possible for the latch finger to sit on top/front of it instead of slide down the side like it is suppose to. Once I added this spacer, there is no way to get the finger to catch on the top/front.
These things really seem like they will do a good job to help protect the corners of the plexi and the paint around the latch finger holes and to stop paint from being scraped off the rollbar.
Jeff says that there is no way that you could damage the interface areas with these. Well almost, if you really were not paying attention to what you were doing, you could still do some damage but not nearly as easy as if you did not have these guides.
Everyone says the whole thing will stiffen up more once the fiberglass is on.... we shall see
Brantel (Brian Chesteen),
RV12-IS, #121606, N912BC - Building Now!
RV10, #41942, N????? - Project Sold
RV-7/TU, #72823, N159SB - SOLD
RV12-IS, #121606, N912BC - Building Now!
RV10, #41942, N????? - Project Sold
RV-7/TU, #72823, N159SB - SOLD
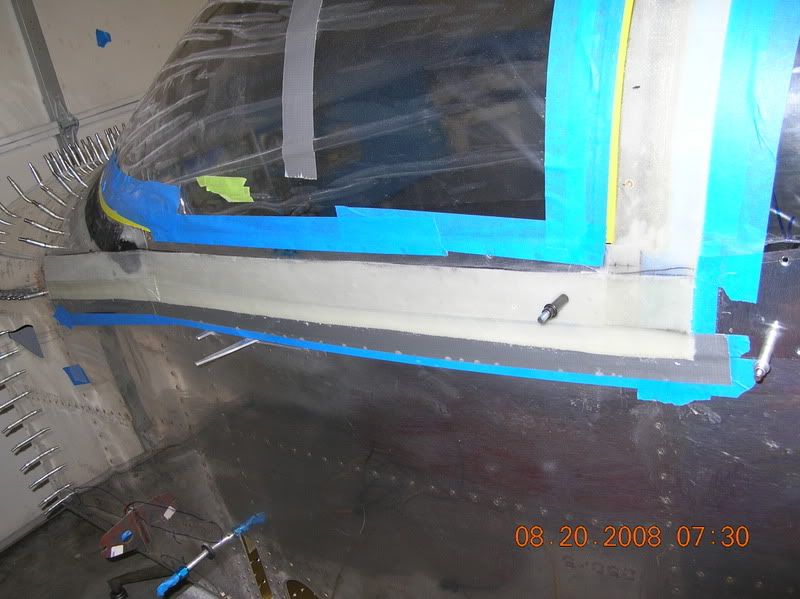
Glassing in Progress!
Got started with glassing in the canopy last night. I have actually been looking forward to this because it will be a huge break from the sheet metal work. I think that I am done with 98% of the sheet metal work. The only thing I have left is to rivet the front and rear top skins on and I want to wait till the last minute to do that.
I had Autobody class 4 years in high school and always enjoyed everything but the hours of sanding so hopefully this won't be that bad.
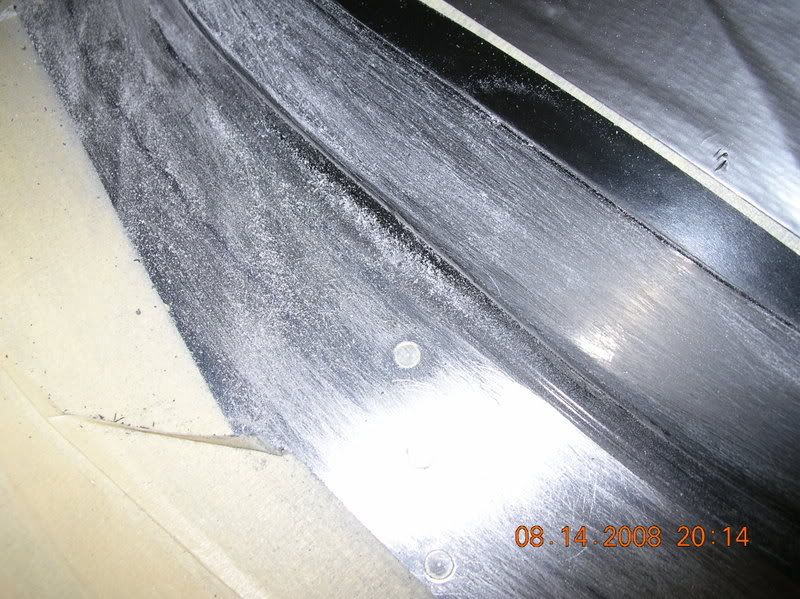
Anyway, got started by sanding the crap out the glass and the metal after taping it off:
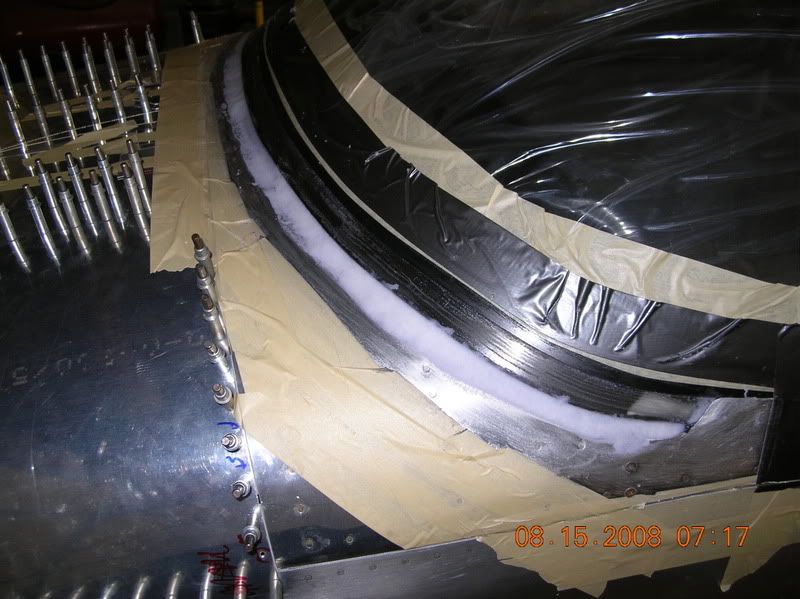
Then I layed down a layer of flox to fillet the area just in front of the glass. Covered that with peel ply and used a piece of foam to set it in.

This morning I had a nice fillet, a little sanding to smooth out the bumps and it is ready for the glass tonight!
I had Autobody class 4 years in high school and always enjoyed everything but the hours of sanding so hopefully this won't be that bad.
Anyway, got started by sanding the crap out the glass and the metal after taping it off:
Then I layed down a layer of flox to fillet the area just in front of the glass. Covered that with peel ply and used a piece of foam to set it in.
This morning I had a nice fillet, a little sanding to smooth out the bumps and it is ready for the glass tonight!
Brantel (Brian Chesteen),
RV12-IS, #121606, N912BC - Building Now!
RV10, #41942, N????? - Project Sold
RV-7/TU, #72823, N159SB - SOLD
RV12-IS, #121606, N912BC - Building Now!
RV10, #41942, N????? - Project Sold
RV-7/TU, #72823, N159SB - SOLD
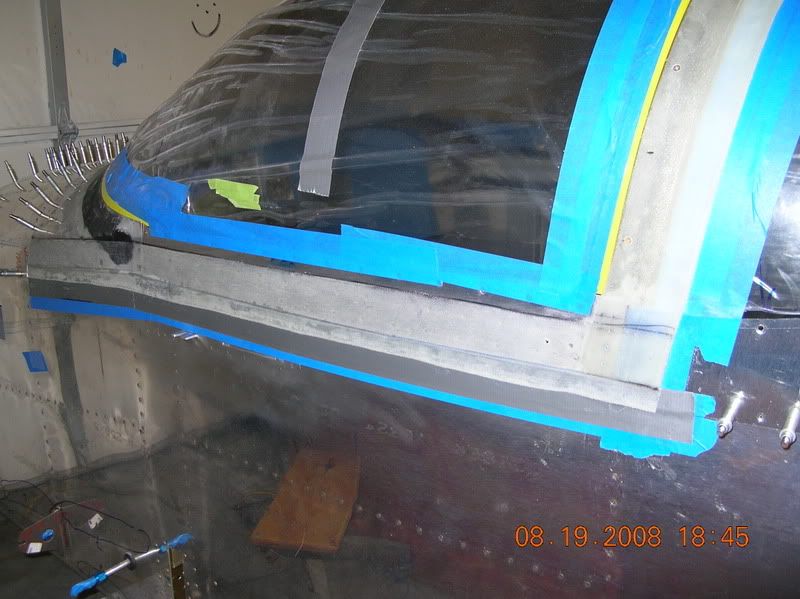
Broke out the fiberglassing supplies.
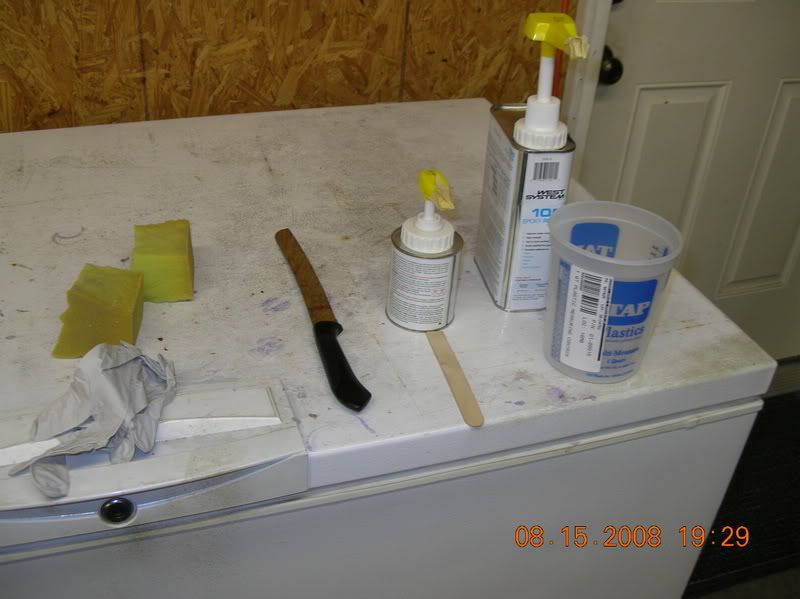
Prepared the tape.
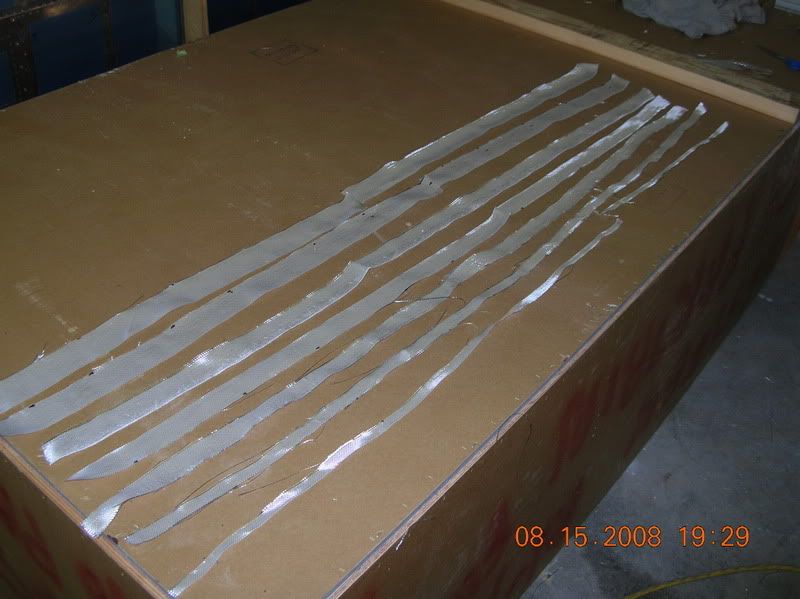
Sorry no pics of the layup but one on top of the other, seven layers, wet out on a board then applied using the "taping it with a sponge" technique.
Covered it all with strips of peel-ply. I mixed black die in the resin for this layup.
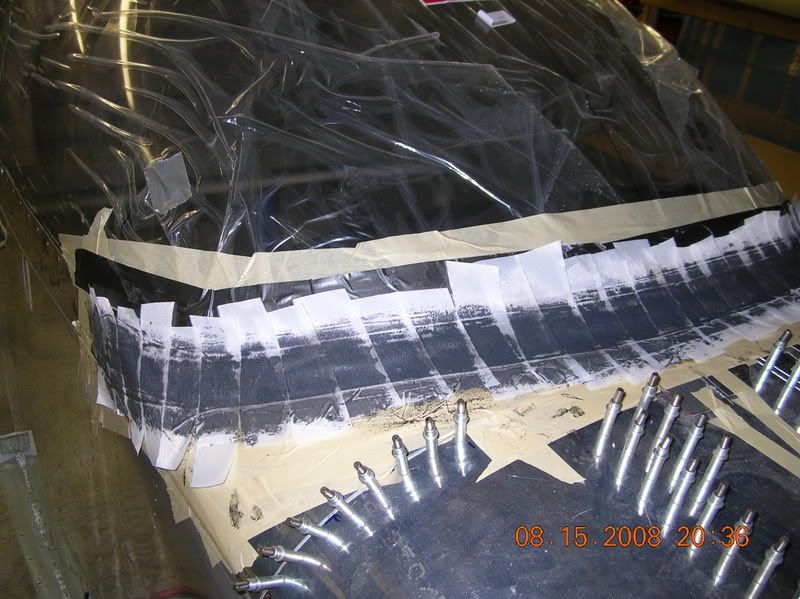
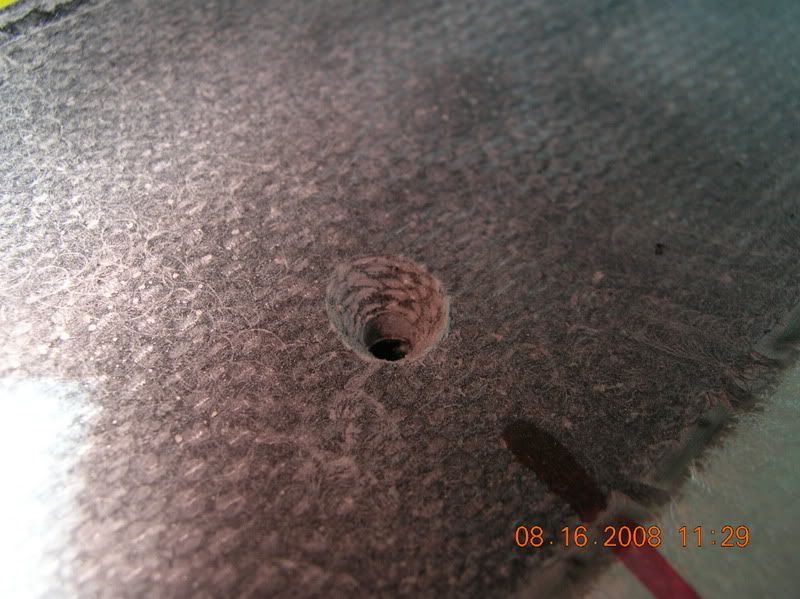
Drilled and countersunk for protective rivets to prevent the fairing from popping loose from the skin. Watch where you drill these around on the sides to prevent drilling into the reinforcement brace.
Put one final layer on top of all that after filling the rivet holes with flox/resin. One wide strip all the way across, finished off with peel-ply.
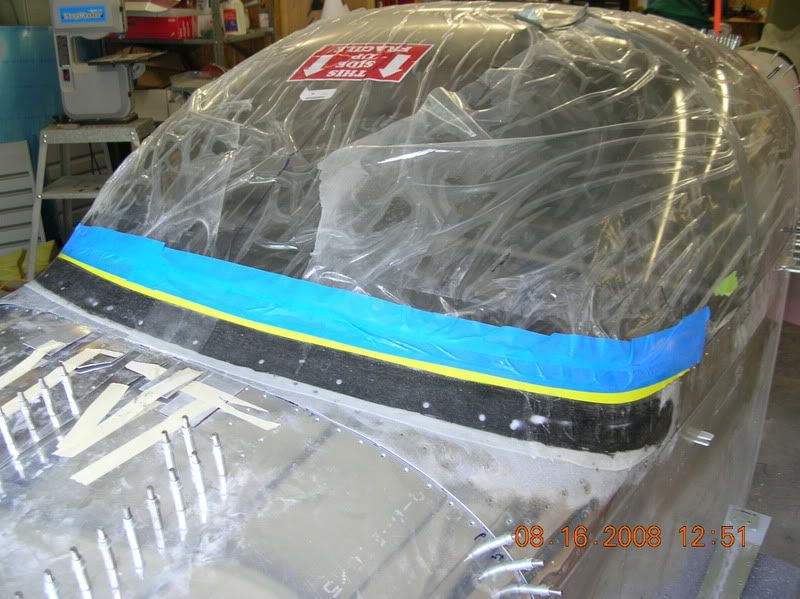
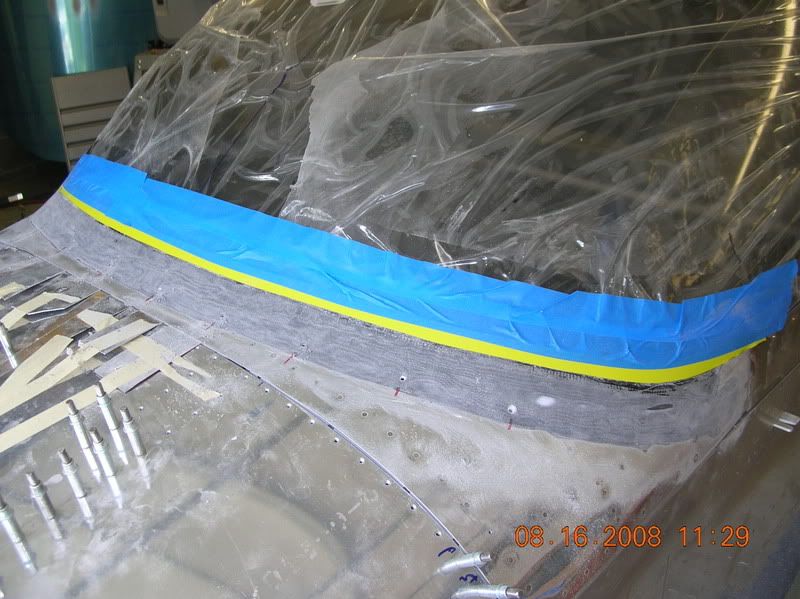
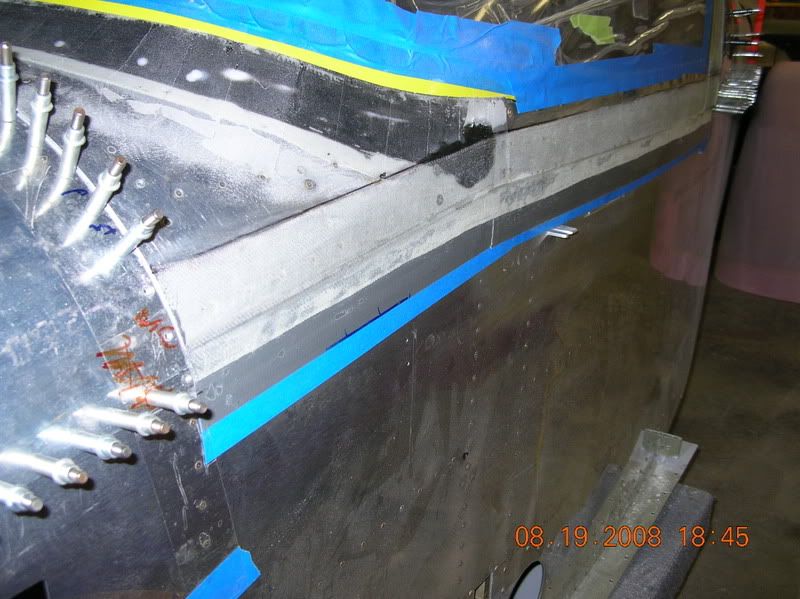
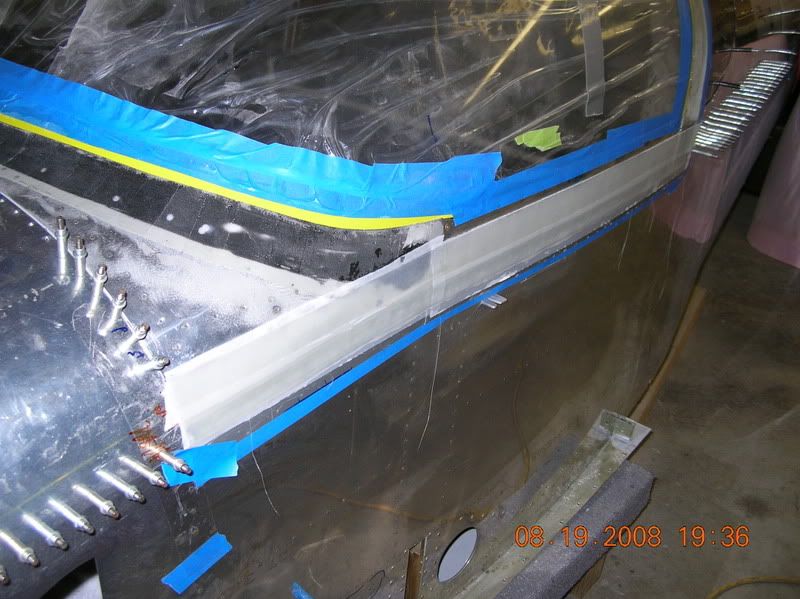
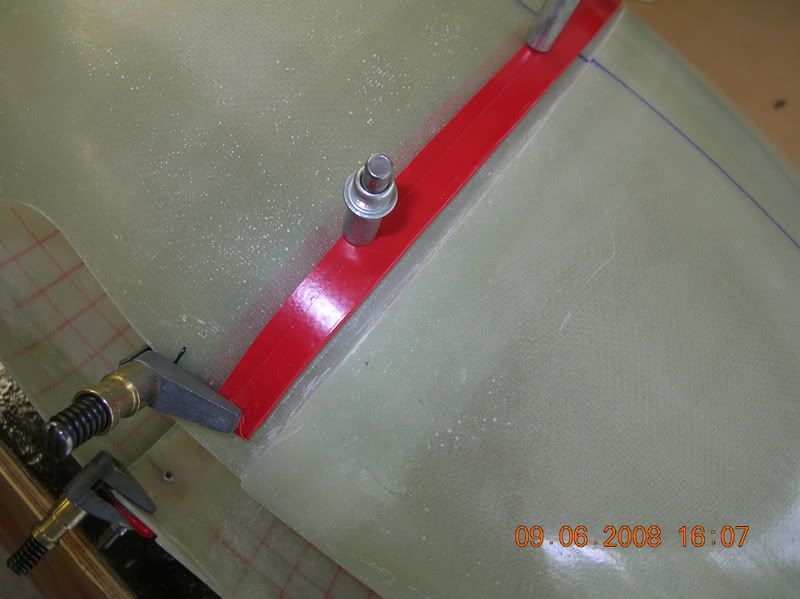
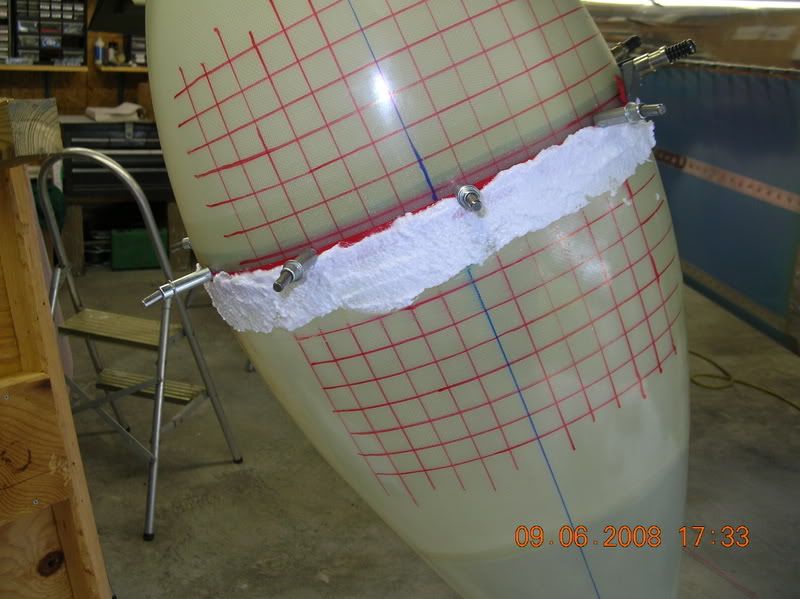
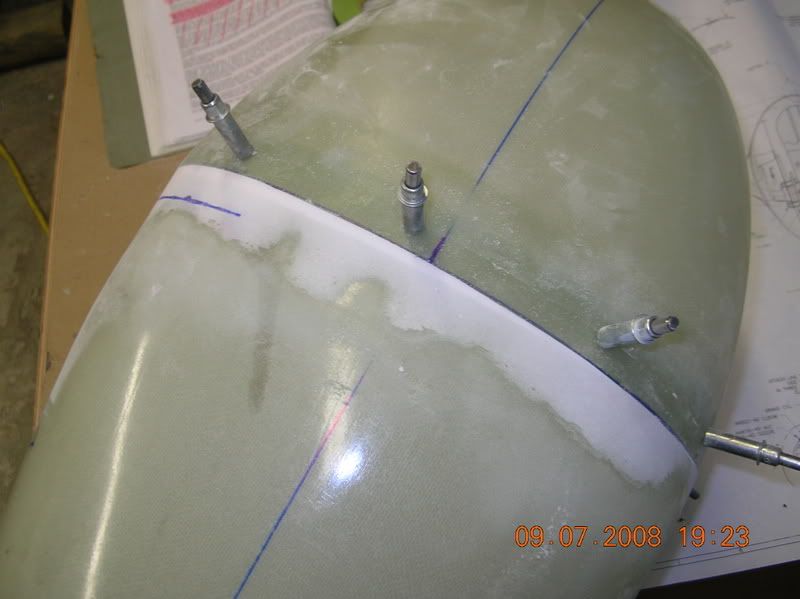
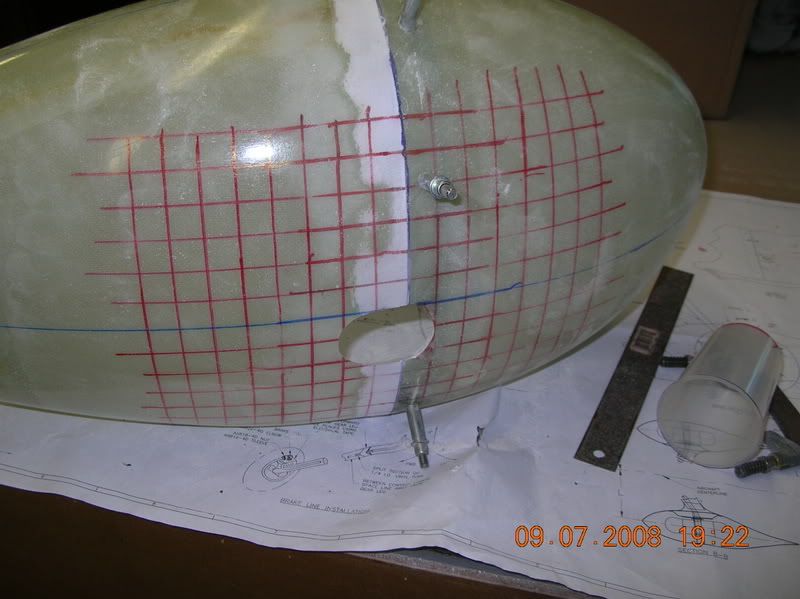
Got started with prep for the targa that I am doing. Tape off and sand the crap out of the plexi and aluminum. Packing tape on top of the blue tape prevents the glass from sticking to where it does not belong...
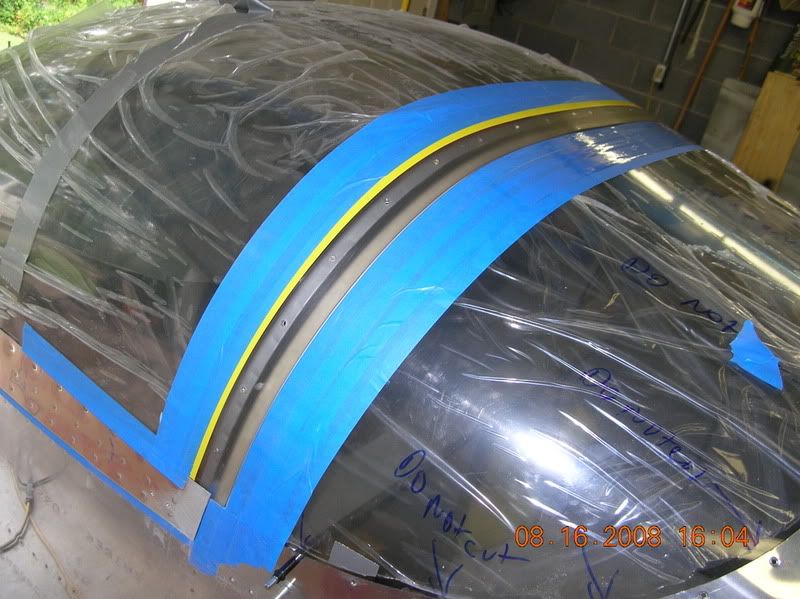
Four full width layers later...

When I did this, I took out every other screw around the canopy frame.
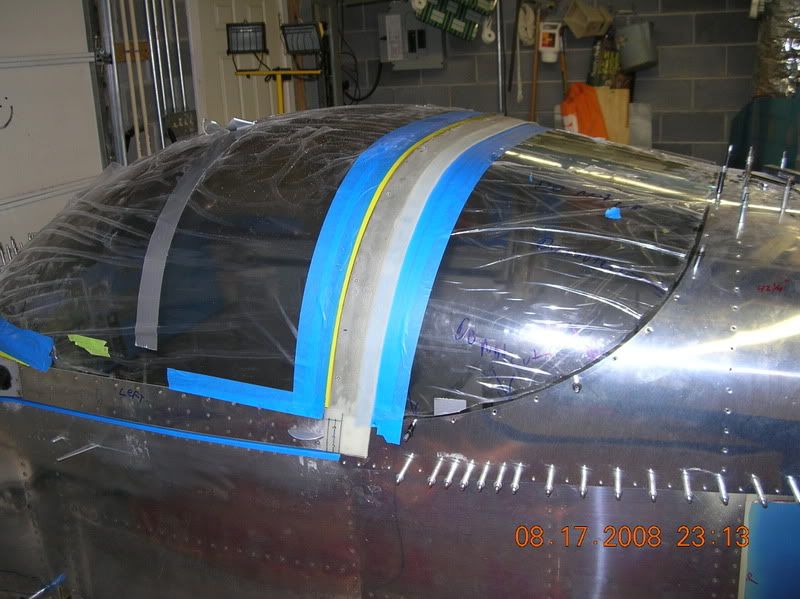
Then I backdrilled these and countersunk them and put the screws back in. This is in an effort to prevent the targa from ever separating from the plexi.
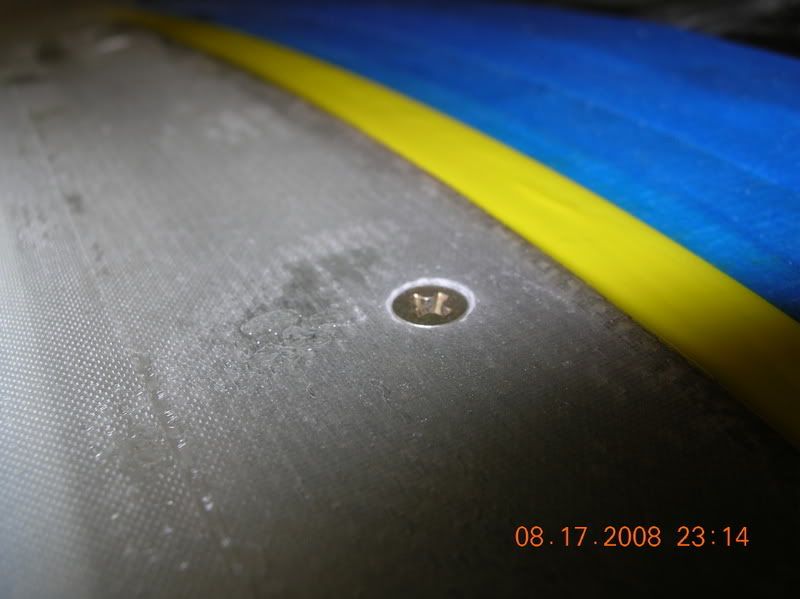
I also put three pop rivets on both sides to the side skirts to help in this area as well. This really holds the targa down tight because of these being at the ends of the curve tied tight to the rigid skirts.
I took a thin card and broke the bond on the targa and the packing tape and after some effort, I was able to get it open. The frustration was not the plexi bonding to something it should not have, it was the fact that I had my latch fingers too tight and they would not unlatch. Prior to the targa, I was pressing down slightly on the bubble to get them to unlatch. Well after the tarta was on, there was no "pressing down" gonna happen.
I eventually got it open and will file some off the latch hooks before I latch it solid again.
Prepared the tape.
Sorry no pics of the layup but one on top of the other, seven layers, wet out on a board then applied using the "taping it with a sponge" technique.
Covered it all with strips of peel-ply. I mixed black die in the resin for this layup.
Drilled and countersunk for protective rivets to prevent the fairing from popping loose from the skin. Watch where you drill these around on the sides to prevent drilling into the reinforcement brace.
Put one final layer on top of all that after filling the rivet holes with flox/resin. One wide strip all the way across, finished off with peel-ply.
Got started with prep for the targa that I am doing. Tape off and sand the crap out of the plexi and aluminum. Packing tape on top of the blue tape prevents the glass from sticking to where it does not belong...
Four full width layers later...
When I did this, I took out every other screw around the canopy frame.
Then I backdrilled these and countersunk them and put the screws back in. This is in an effort to prevent the targa from ever separating from the plexi.
I also put three pop rivets on both sides to the side skirts to help in this area as well. This really holds the targa down tight because of these being at the ends of the curve tied tight to the rigid skirts.
I took a thin card and broke the bond on the targa and the packing tape and after some effort, I was able to get it open. The frustration was not the plexi bonding to something it should not have, it was the fact that I had my latch fingers too tight and they would not unlatch. Prior to the targa, I was pressing down slightly on the bubble to get them to unlatch. Well after the tarta was on, there was no "pressing down" gonna happen.
I eventually got it open and will file some off the latch hooks before I latch it solid again.
Brantel (Brian Chesteen),
RV12-IS, #121606, N912BC - Building Now!
RV10, #41942, N????? - Project Sold
RV-7/TU, #72823, N159SB - SOLD
RV12-IS, #121606, N912BC - Building Now!
RV10, #41942, N????? - Project Sold
RV-7/TU, #72823, N159SB - SOLD
Decided that the design flaw in the canopy was driving me crazy! The gaps on the sides had to go so I am going to try side skirt/canopy skin extensions.
First got started with laying up several layers of tape to give the extensions some room for opening and closing.
Then layed up one layer 3" wide front to back and let that cure for 24 hours.
After that was cured, I made several narrower strips of various lengths to fill in or out where the side skirts/skin either overhung or sat inside the fuse.
Then I layed up two more 3" wide full length layers and covered that with peel ply.
This morning the peel ply was removed and everything looks great! Popped the extensions loose from the fuse and opened and closed just fine. It is almost like they are not there at all.
I overhung the fuse by about 3/4" on these layups and plan to sand that back to about 5/8" when truing these up and finishing the edges.
Overall I am very pleased with the way these are coming out. I plan to countersink and install some rivets along the bottom edge as low as possible to help prevent them from ever separating from the skirts.
Three layers seems to be plenty stiff! I plan to cut the aft end of these off at a 45° angle to intersect the side skirt right at the split in front of the space between the skirt and the aft top skin where it screws to the rollbar. This will prevent these extensions from ever catching on the aft top skin wings as it closes. The Targa has plenty of gap in that area so it does not catch at all in that spot.
Here is a pic of what I am trying to explain:
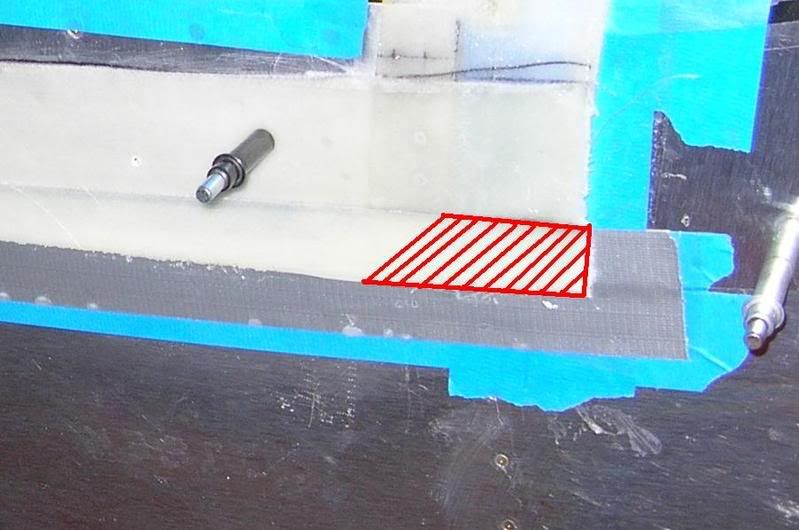
Best of all: NO MORE GAPS!
First got started with laying up several layers of tape to give the extensions some room for opening and closing.
Then layed up one layer 3" wide front to back and let that cure for 24 hours.
After that was cured, I made several narrower strips of various lengths to fill in or out where the side skirts/skin either overhung or sat inside the fuse.
Then I layed up two more 3" wide full length layers and covered that with peel ply.
This morning the peel ply was removed and everything looks great! Popped the extensions loose from the fuse and opened and closed just fine. It is almost like they are not there at all.
I overhung the fuse by about 3/4" on these layups and plan to sand that back to about 5/8" when truing these up and finishing the edges.
Overall I am very pleased with the way these are coming out. I plan to countersink and install some rivets along the bottom edge as low as possible to help prevent them from ever separating from the skirts.
Three layers seems to be plenty stiff! I plan to cut the aft end of these off at a 45° angle to intersect the side skirt right at the split in front of the space between the skirt and the aft top skin where it screws to the rollbar. This will prevent these extensions from ever catching on the aft top skin wings as it closes. The Targa has plenty of gap in that area so it does not catch at all in that spot.
Here is a pic of what I am trying to explain:
Best of all: NO MORE GAPS!
Brantel (Brian Chesteen),
RV12-IS, #121606, N912BC - Building Now!
RV10, #41942, N????? - Project Sold
RV-7/TU, #72823, N159SB - SOLD
RV12-IS, #121606, N912BC - Building Now!
RV10, #41942, N????? - Project Sold
RV-7/TU, #72823, N159SB - SOLD
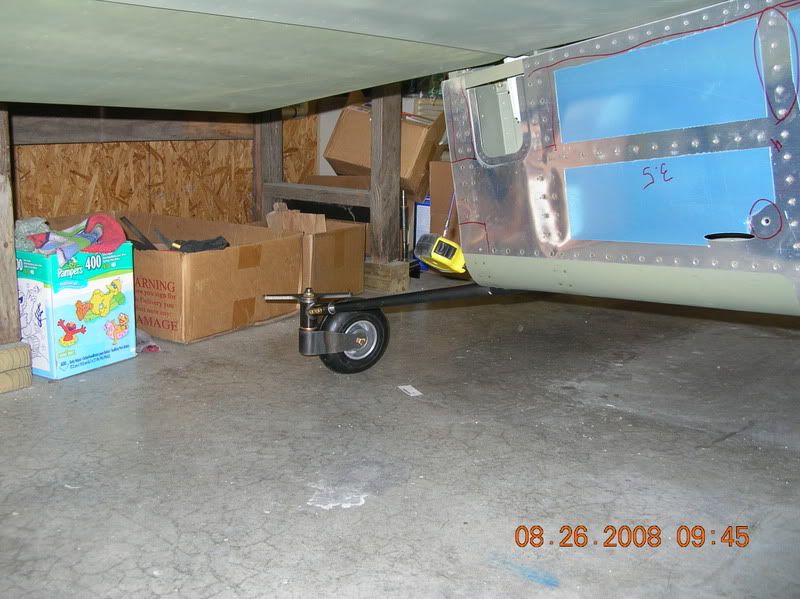
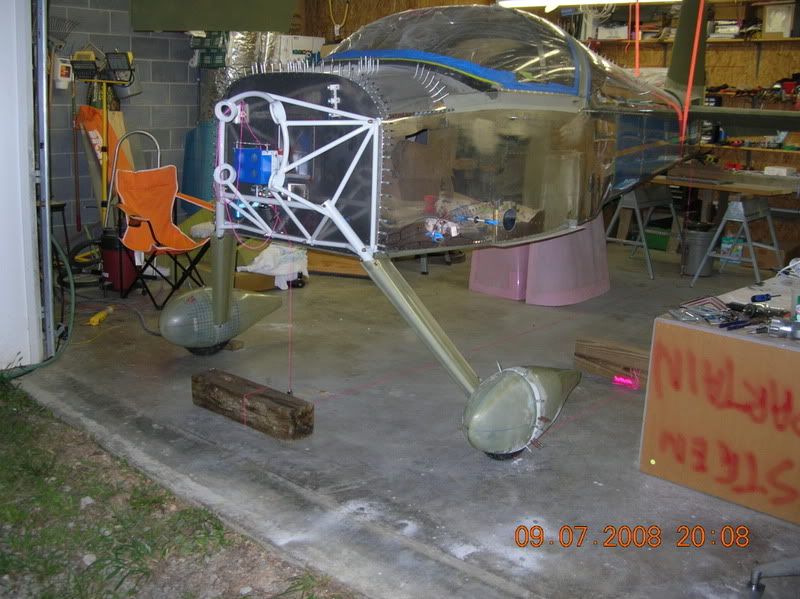
On the gear and rolling!
Engine mount hung, on the gear and rolling! Ready for that engine!
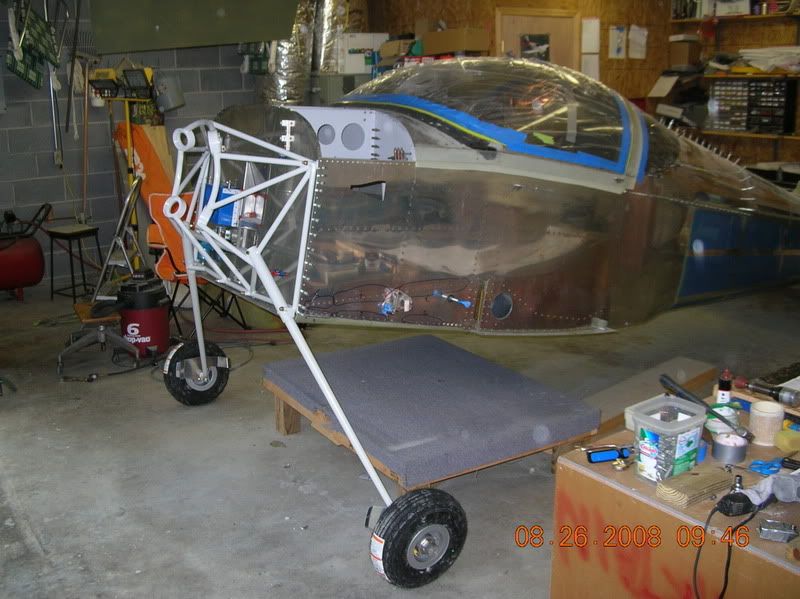
This may have to go in favor of a better one but for now it is on there!
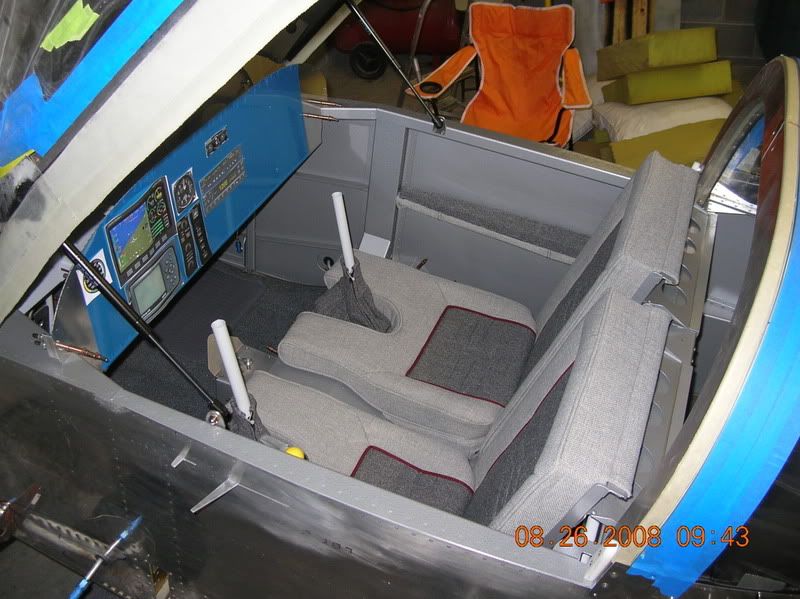
and to see if I could still open the canopy enough to get in, a nice shot of the interior. The end result is that it does not open all the way but almost! I can still get in/out no problem.
This may have to go in favor of a better one but for now it is on there!
and to see if I could still open the canopy enough to get in, a nice shot of the interior. The end result is that it does not open all the way but almost! I can still get in/out no problem.
Brantel (Brian Chesteen),
RV12-IS, #121606, N912BC - Building Now!
RV10, #41942, N????? - Project Sold
RV-7/TU, #72823, N159SB - SOLD
RV12-IS, #121606, N912BC - Building Now!
RV10, #41942, N????? - Project Sold
RV-7/TU, #72823, N159SB - SOLD

-
Spike
- Chief Rivet Banger
- Posts: 4013
- Joined: Thu Oct 14, 2004 8:40 pm
- Location: Baltimore, MD
- Contact:
Very drool worthy.
http://www.rivetbangers.com - Now integrating web and mail!
Current Build: 2 years into a beautiful little girl
Current Build: 2 years into a beautiful little girl

Status Brantel
Waiting on my engine so I can get started fitting the cowl.
In the meantime, I decided to work on the wheel pants and fairings.....
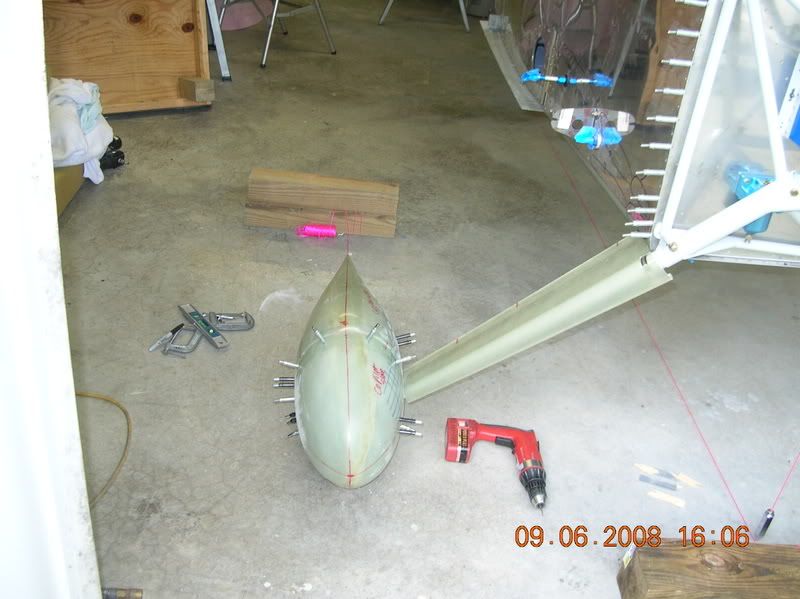
One of my pants fit together really well after about 30 minutes of filing of the front half to the back parts. Not too much work on one of them. I designated it the co-pilot side and completely installed it before getting started on the pilot side.
The biggest problem with these is that there is no way reference for centerline in any direction on these. The starter hole for the wheel is totally off and should not be used for any reference!
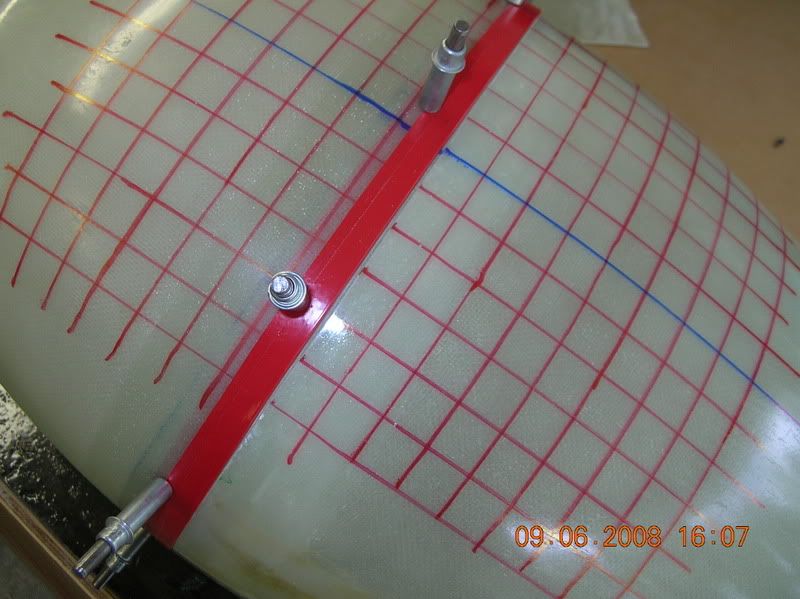
What I did was take the aft part of the pant and lay it down open end down on some poster board. I then marked all the way around the pant and then cut out the oval. I then folded the oval perfectly in half in both directions to get a centerline. I used this to mark center marks both vertical and horizontal. You can measure the aft end so then all you do is connect the dots. I used tape to laydown a straight line.
To find the exact center point of the front half, I held the front part nose up with a blunt pointed object. I shook it around till it found the center point and marked the point on the nose. Then I connected the dots to the rear half.
This gives you some reference lines to go by...
One note: Automotive hose clamps are only stainless on the band. Lowes and Home Depot sell all stainless hose clamps. I used these per the plans to hold up the gear leg fairings.
Here is the co-pilot side ready to go. There is no way the 8-5/8" dim they give me on the plans would work. I ended up with 8-1/4" when the pant was sitting on the 1" spacer block.
You can see that the fairing is in perfect alignment with the parallel line on the floor. I pulled this shorter line off of the centerline of the tire.
Now for the pilot side!!!!
This thing was a total piece of poo! The front half would not match the rear half due to wavyness of the edge around the front half.
So I took it and sat it on a flat board and scribbed a line all the way around it and filed to the line.
Next problem was that the "flange" width on the rear half started out at 1-1/8" on one side and came up to 1-3/8"+ on the other side. There was no way to make the front fit the back without some major grinding and misshaping of the front half.
One side looks ok..
This side had a 1/4"+ gap....
So I said the heck with that and after sanding the gloss off and cleaning the parts with MEK and taping off the joint, I mixed up a batch of 50/50 flox and microballoons with epoxy to the concistency of toothpaste. I painted the joints with pure epoxy and then I applied a liberal coating of this stuff and let it sit.
After sanding, the parts fit together perfectly.
Here is a pic that will let you do a rough cutout for the axle hole. These gridlines are made with 3/4" wide tape so you can tell approximately how to make these cutouts to get them on there. They may need modifying a little to get the brake line thru.
The centerlines mentioned above will be critical for you to layout the wheel cutout to ensure it is symetrical. The starter hole Van's puts in there is not close! Don't trust it!
Now I can go fast during the test flight!
In the meantime, I decided to work on the wheel pants and fairings.....
One of my pants fit together really well after about 30 minutes of filing of the front half to the back parts. Not too much work on one of them. I designated it the co-pilot side and completely installed it before getting started on the pilot side.
The biggest problem with these is that there is no way reference for centerline in any direction on these. The starter hole for the wheel is totally off and should not be used for any reference!
What I did was take the aft part of the pant and lay it down open end down on some poster board. I then marked all the way around the pant and then cut out the oval. I then folded the oval perfectly in half in both directions to get a centerline. I used this to mark center marks both vertical and horizontal. You can measure the aft end so then all you do is connect the dots. I used tape to laydown a straight line.
To find the exact center point of the front half, I held the front part nose up with a blunt pointed object. I shook it around till it found the center point and marked the point on the nose. Then I connected the dots to the rear half.
This gives you some reference lines to go by...
One note: Automotive hose clamps are only stainless on the band. Lowes and Home Depot sell all stainless hose clamps. I used these per the plans to hold up the gear leg fairings.
Here is the co-pilot side ready to go. There is no way the 8-5/8" dim they give me on the plans would work. I ended up with 8-1/4" when the pant was sitting on the 1" spacer block.
You can see that the fairing is in perfect alignment with the parallel line on the floor. I pulled this shorter line off of the centerline of the tire.
Now for the pilot side!!!!
This thing was a total piece of poo! The front half would not match the rear half due to wavyness of the edge around the front half.
So I took it and sat it on a flat board and scribbed a line all the way around it and filed to the line.
Next problem was that the "flange" width on the rear half started out at 1-1/8" on one side and came up to 1-3/8"+ on the other side. There was no way to make the front fit the back without some major grinding and misshaping of the front half.
One side looks ok..
This side had a 1/4"+ gap....
So I said the heck with that and after sanding the gloss off and cleaning the parts with MEK and taping off the joint, I mixed up a batch of 50/50 flox and microballoons with epoxy to the concistency of toothpaste. I painted the joints with pure epoxy and then I applied a liberal coating of this stuff and let it sit.
After sanding, the parts fit together perfectly.
Here is a pic that will let you do a rough cutout for the axle hole. These gridlines are made with 3/4" wide tape so you can tell approximately how to make these cutouts to get them on there. They may need modifying a little to get the brake line thru.
The centerlines mentioned above will be critical for you to layout the wheel cutout to ensure it is symetrical. The starter hole Van's puts in there is not close! Don't trust it!
Now I can go fast during the test flight!
Brantel (Brian Chesteen),
RV12-IS, #121606, N912BC - Building Now!
RV10, #41942, N????? - Project Sold
RV-7/TU, #72823, N159SB - SOLD
RV12-IS, #121606, N912BC - Building Now!
RV10, #41942, N????? - Project Sold
RV-7/TU, #72823, N159SB - SOLD
Sorry Smitty. I totally missed this request...smittysrv wrote:Very interesting panel layout. Would you mind posting a shot of that?
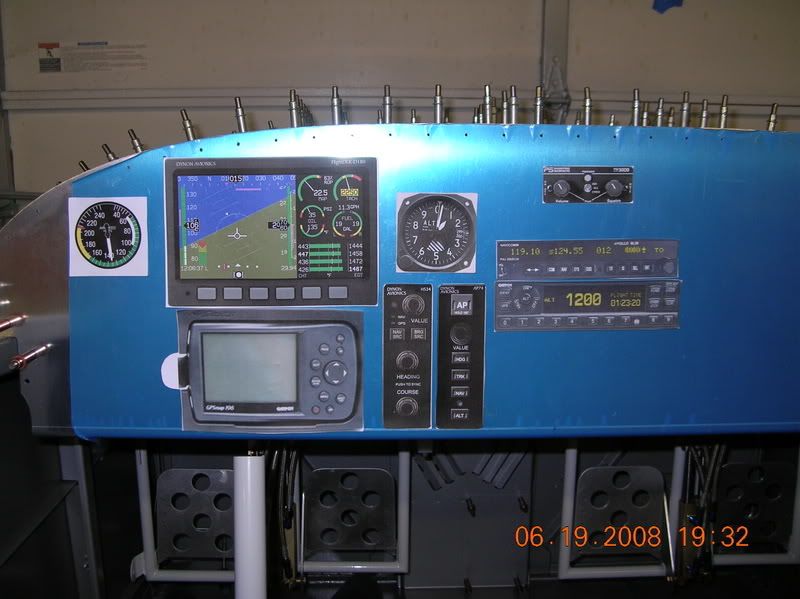
Shown here is the AP74, I will be going with the AP76 instead.
Planning VFR(with the ability to shoot practice ILS, VOR and Localizer based approaches by using the X96 for practice DME/ADF/Etc) to stay IFR current and the occassional thin layer penetration.
This gives me that. The problem is screen space on the Dynon. They won't do EFIS/EMS/HSI all on one screen so this leaves you either ignoring the EMS or the HSI at some point.
I may add a D10A like this (without the 430, TT ADI or Audio Panel):
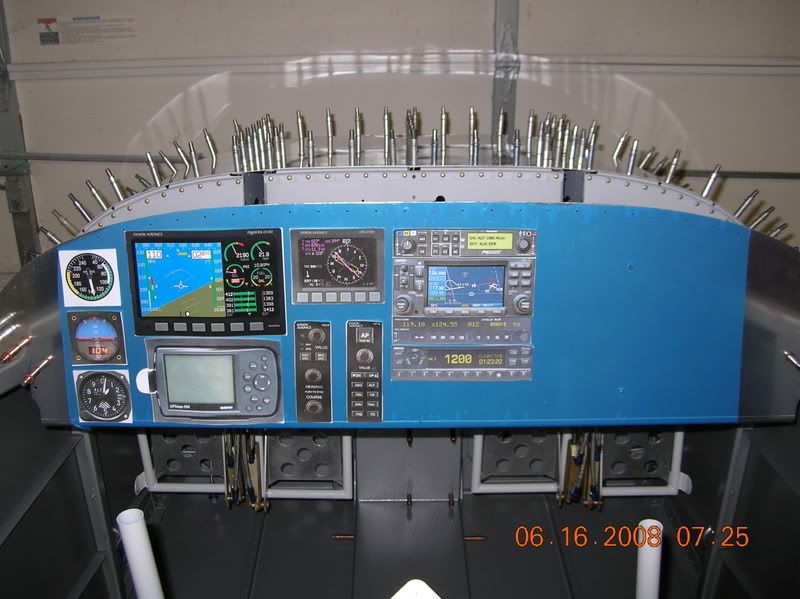
Or a D100 like this (without the 430, TT ADI or Audio Panel):
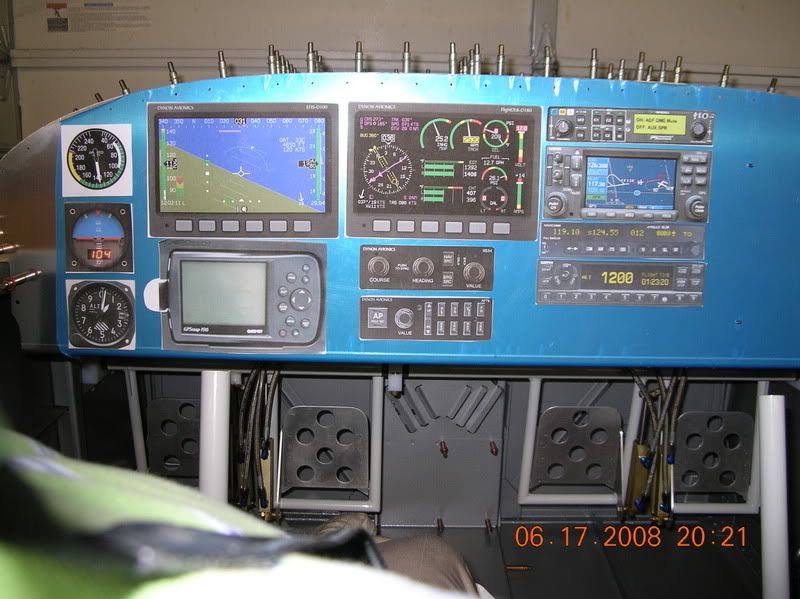
Later if and when I ever feel froggy enough to take this baby in the clouds, I will add a TT ADI for backup and either a 430W or a 300XL and an Audiopanel/Marker beacon rec'vr.
Brantel (Brian Chesteen),
RV12-IS, #121606, N912BC - Building Now!
RV10, #41942, N????? - Project Sold
RV-7/TU, #72823, N159SB - SOLD
RV12-IS, #121606, N912BC - Building Now!
RV10, #41942, N????? - Project Sold
RV-7/TU, #72823, N159SB - SOLD
Brian, what are you using for interior paint? It looks great!
I just started painting interior this weekend... I picked up some gray catalysed urethane from the napa automotive paint store, stuff I've used in the past with success painting bike fairings. I added flattener to flatten to semi-gloss, but it still seems a bit shiny for my taste.
The stuff you're using has a nice texture to it... what is it? How durable has it been thus far?
Ian
RV-7 SB, chugging toward final assembly
IO-360-C1C 200hp obtained.
Hartzell BA prop received.
James Cowl ordered.
N773WW reserved!
RV-7 SB, chugging toward final assembly
IO-360-C1C 200hp obtained.
Hartzell BA prop received.
James Cowl ordered.
N773WW reserved!
It is Rustoleum Hammered Silver. I bought it in quart cans and thinned per the directions and sprayed with cheap HF gravity feed HVLP gun.
It is not as durable as two part but it works for me. It is tricky to get the texture to come out perfectly even but doable.
So far not much damage to mine since painting. I have been in and out a million times working on the canopy.
It is not as durable as two part but it works for me. It is tricky to get the texture to come out perfectly even but doable.
So far not much damage to mine since painting. I have been in and out a million times working on the canopy.
Brantel (Brian Chesteen),
RV12-IS, #121606, N912BC - Building Now!
RV10, #41942, N????? - Project Sold
RV-7/TU, #72823, N159SB - SOLD
RV12-IS, #121606, N912BC - Building Now!
RV10, #41942, N????? - Project Sold
RV-7/TU, #72823, N159SB - SOLD
thanks!
and btw, I know what you mean about the look of the cad plate hardware against the paint... I'm deliberately painting my interior pieces prior to assembly, and the rivet heads look awesome against the gray.
and btw, I know what you mean about the look of the cad plate hardware against the paint... I'm deliberately painting my interior pieces prior to assembly, and the rivet heads look awesome against the gray.
Ian
RV-7 SB, chugging toward final assembly
IO-360-C1C 200hp obtained.
Hartzell BA prop received.
James Cowl ordered.
N773WW reserved!
RV-7 SB, chugging toward final assembly
IO-360-C1C 200hp obtained.
Hartzell BA prop received.
James Cowl ordered.
N773WW reserved!