the big cut

A forum in which to discuss topics specific to the assembly of the RV 7/7A.
Post Reply
User avatar
hydroguy2
Class B
Posts: 1307
Joined: Mon Sep 10, 2007 11:13 pm
Location: Townsend, Montana

the big cut

Post by hydroguy2 »

Like most of the build so far, The fear of the unknown is worse than the actual job. Today I jumped in with both feet and tackled one of the most feared items in RV building.

Image

15 minutes later. EASY
Image
Brian
Townsend, MT

M browning
Class G
Posts: 3
Joined: Sat Jun 07, 2008 8:22 am
Location: England

Post by M browning »

My canopy cut is not too far away now and not really looking forward to it
Must admit your comments are encouraging :roll:
I like the idea of the lights Good idea for keeping the temperature up on the plexi !

User avatar
bullojm1
Chief Rivet Banger
Posts: 1374
Joined: Sat Mar 25, 2006 6:37 pm
Location: KDMW
Contact:

Post by bullojm1 »

Brian-

Congratulations on the Big Cut! I wish I could say the worst is over with the canopy....but is isn't! Keep up the diligent work and you won't have a problem like the rest of us. Last time I checked, Chad, Brian and I all did canopies this summer and none of us had any hint of a crack.

My one recommendation is when it comes to countersinking the plexiglass, buy a brand new bit. I experimented with some older used bits I had and the countersink wasn't as clean as it could of been. A new bit made it PERFECT. For the 8 bucks or so for a new bit, it's cheap insurance down the road!
Mike Bullock
http://www.rvplane.com
RV-7 | Superior IO-360 | Whirlwind 200RV
Garmin GTN650 | GRT Dual Sport SX EFIS
Status: FLYING!

User avatar
hydroguy2
Class B
Posts: 1307
Joined: Mon Sep 10, 2007 11:13 pm
Location: Townsend, Montana

Post by hydroguy2 »

browning-a few months ago when anyone spoke of canopy work, I would shutter, sweat and wet myself in fear. :mrgreen: Then after browsing plenty of builder logs, I figured it was just another RV job which everybody does, so just do it.

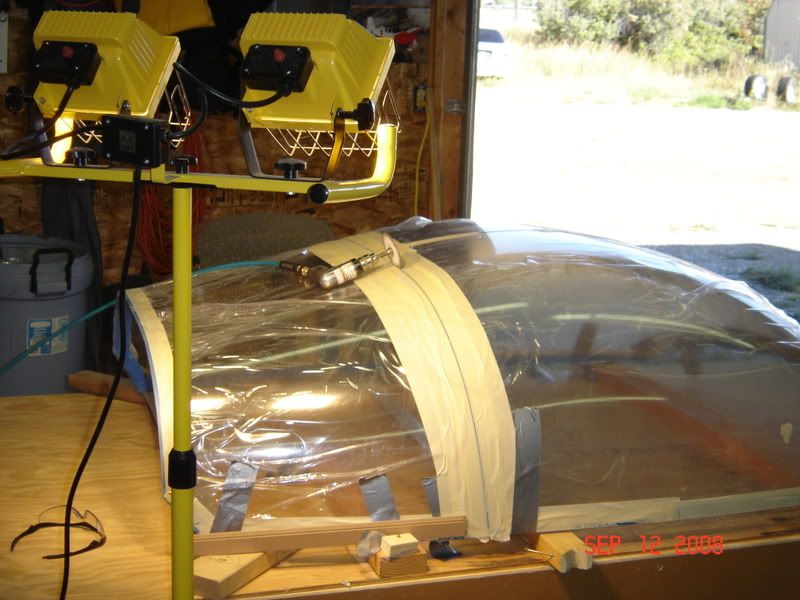
Support the canopy. I used the top of my finish kit box as a work platform. I screwed blocks the width of the fuselage to keep the canopy from spreading (along with a couple of tape stringers).

My shop is usually around 70 on the days I did my cutting. No need to heat the whole shop, as the halogen lights put out a lot of localized heat.
I use a digital thermometer, placed on top first. within 30 minutes the canopy is >85*F. Next lower the lights and place the thermometer underneath. by directing the heat under the end the canopy stayed toasty warm. Don't warm it too fast or too hot. By the time I was done cutting the area underneath was 95-105.

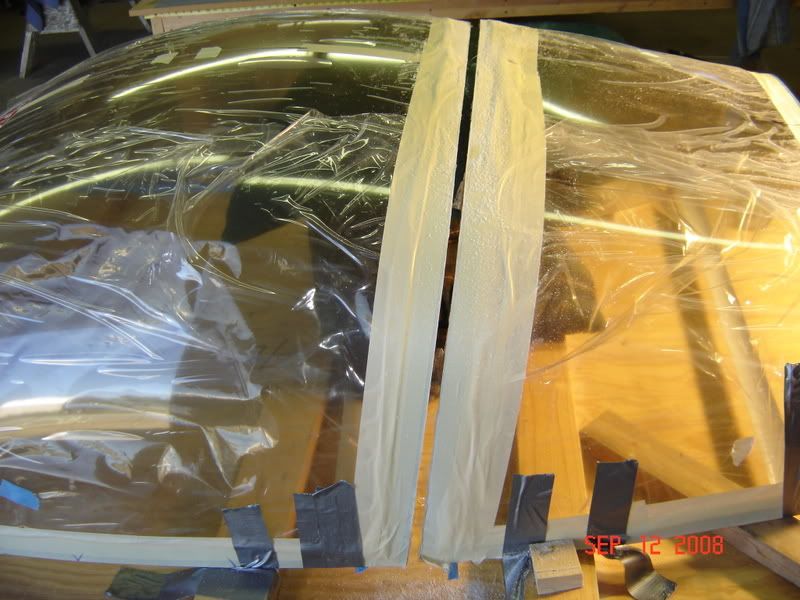
I used the Vans supplied discs in my Mac airdrill. Easy to control the speed. Too slow and the disc wanted to creep off line or grab. High speed seemed to melt a groove in the plexi. I liked a medium speed and made many passes to deepen the groove. This way the canopy is connected until the last little lip is severed. almost no tension and no surprizes.

mike- thanks already got a new countersink...but forgot to order a plexi drillbit
Last edited by hydroguy2 on Sat Sep 13, 2008 8:54 am, edited 1 time in total.
Brian
Townsend, MT

User avatar
bullojm1
Chief Rivet Banger
Posts: 1374
Joined: Sat Mar 25, 2006 6:37 pm
Location: KDMW
Contact:

Post by bullojm1 »

hydroguy2 wrote: Don't warm it too fast or too hot
This is very important! A local RV8 builder called up the canopy manufacturers to ask about how hot he could get the canopy. I believe at a little over 120 or 130 F it starts to break down and melt :o Shoot for 80-90 like Van's recommends and you should be fine.
Mike Bullock
http://www.rvplane.com
RV-7 | Superior IO-360 | Whirlwind 200RV
Garmin GTN650 | GRT Dual Sport SX EFIS
Status: FLYING!

Post Reply