What's everyone working on today?
cool, someone else is normal in this crowd.
i dont see how some of you stay so neat. i cant do it for the life of me.
i dont see how some of you stay so neat. i cant do it for the life of me.
Last edited by weezbad on Sun Feb 03, 2008 7:54 pm, edited 1 time in total.
william....don't let it beat you down, you are stronger than you think.
-
captain_john

- Sparky
- Posts: 5880
- Joined: Sun Oct 31, 2004 9:17 am
- Location: KPYM
John, as you know that pic was taken a couple of summers ago.
Willie, the 'hood is established (15 years), but those trees were there all along. You don't have to clean the place out to put in a house. Many builders don't know that!
Kelly, Looks like my yard 1 week ago!
 CJ
CJ
Willie, the 'hood is established (15 years), but those trees were there all along. You don't have to clean the place out to put in a house. Many builders don't know that!
Kelly, Looks like my yard 1 week ago!
RV-7
Garmin G3X with VP-X & a TMX-IO-360 with G3i
It's all over but the flying! 800+ hours in only 3 years!
Garmin G3X with VP-X & a TMX-IO-360 with G3i
It's all over but the flying! 800+ hours in only 3 years!
-
cnpeters

- Class E
- Posts: 185
- Joined: Tue Jul 04, 2006 7:04 pm
- Location: Eureka (St. Louis), MO
- Contact:
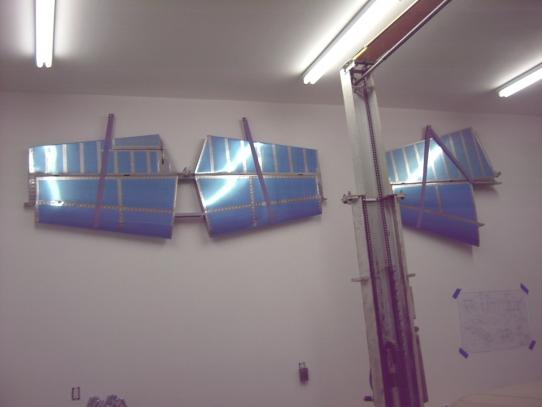
Well, instead of a quiet and amorous weekend frolicking with his wife, Chad graciously helped with two projects - yesterday we put the RV-9A wings up on shelves 7 feet up to open more floor space as the fuse will start coming together soon. Then today, he helped me for 4 hours riveting the aft fuse, which I had stored waiting for a part as I did the center section. Went real smooth. Thanks, bud!


-
John Courte
- Class G
- Posts: 27
- Joined: Sun Oct 22, 2006 4:44 pm
- Location: KSMO
Wingtips, they are finish.
All done on the wingtips, except for glassing in the Archer VOR antenna. duct tape's fine for now, just need to hold it to the tip so the nutplates don't stress it too much.
Much of my time has been involving the moving of dirt for the wife's fruit trees, and a case of the flu that had me wishing for death or unconsciousness for most of last week.
Much of my time has been involving the moving of dirt for the wife's fruit trees, and a case of the flu that had me wishing for death or unconsciousness for most of last week.

Man, it's good to see that some of us are actually working on RV stuff. Not that I don't have my share of honey-do stuff to keep me occupied. But this weekend, I managed to get over 11 hours in on the project: drilled my z-brackets for the right wing, riveted the nutplates on, bolted the z-brackets to the wing spar, then mounted the tank for drilling per the Dan Checkoway method. Finished all that, dismantled everything and drilled the tank skin to ribs. Going full-bore now to get this tank finished. I actually can't wait to get into the proseal again (the sooner I get started, the sooner I'll be done with the stuff). I have a fuse kit on order, so the fire is under me to get these wings finished!
Might as well work in the shop while the relentless rains keep falling!
Can anyone give me a couple of hints on how you post pictures here? Is there a trick to uploading them somehow?
Might as well work in the shop while the relentless rains keep falling!
Can anyone give me a couple of hints on how you post pictures here? Is there a trick to uploading them somehow?
-
cnpeters
- Class E
- Posts: 185
- Joined: Tue Jul 04, 2006 7:04 pm
- Location: Eureka (St. Louis), MO
- Contact:
I use the VAF suggestion in their forums section. Go to http://www.imageshack.us/ ,click on 'browse' to locate your pic on your computer, then click 'host it'. I usually choose 640X480 size for pics, but if you want a smaller pic select 320X240. It will take at least 30 seconds to create a URL for your pic - copy the bottom most entry that states "direct link to image".BSwayze wrote:Can anyone give me a couple of hints on how you post pictures here? Is there a trick to uploading them somehow?
Before pasting here, click the Img/Image button above this box when in writing mode, then paste your link, then click the Img button one more time. You will have your link bracketed with these


-
Spike
- Chief Rivet Banger
- Posts: 4013
- Joined: Thu Oct 14, 2004 8:40 pm
- Location: Baltimore, MD
- Contact:
Alternatively if you want we can give you your own rivetbangers.com gallery and you can use that to put pictures in your posts. You will also get a button that takes you to your gallery, etc.
There is a big thread on it in the support forum.
You can also check out the RB gallery by clicking "Gallery" at the top of the page. From there you can surf the galleries of the users who have gone that route.
John
There is a big thread on it in the support forum.
You can also check out the RB gallery by clicking "Gallery" at the top of the page. From there you can surf the galleries of the users who have gone that route.
John
http://www.rivetbangers.com - Now integrating web and mail!
Current Build: 2 years into a beautiful little girl
Current Build: 2 years into a beautiful little girl

I just finished my wing stand a couple of days ago and then drilled (actually reamed) the skins to the ribs/spars on my left wing. No room in my shop for two wing stands, so just one at a time for me. Now to edge finish a whole lot of skins and make the holder for the leading edge.
Don Sinclair
CYKF
RV-7A (Fuselage)
CYKF
RV-7A (Fuselage)
Thanks, Carl, and Spike for the help!
Here's a few shots of my project, starting with my finished rudder about a year ago, and more recently, my son Daniel helping me rivet the top skins on my left wing.
Bruce


Looks even better mounted on the V.S.!

I'm shooting rivets from inside with an extended double-offset backrivet set, Daniel's bucking 'em from the front. I highly recommend this method... came out perfect!

Here's a few shots of my project, starting with my finished rudder about a year ago, and more recently, my son Daniel helping me rivet the top skins on my left wing.
Bruce
Looks even better mounted on the V.S.!
I'm shooting rivets from inside with an extended double-offset backrivet set, Daniel's bucking 'em from the front. I highly recommend this method... came out perfect!
Last edited by BSwayze on Sat Feb 09, 2008 1:11 am, edited 1 time in total.


I installed my wings today! Pics have been taken, but not downloaded. Typing on the shop computer.
Wings are dead straight incidence wise. Triangulation quick check shows about .040 difference. Gonna put it to bed for the night, check it all about 3 times tomorrow, then drill the rear spar holes.
Wings are dead straight incidence wise. Triangulation quick check shows about .040 difference. Gonna put it to bed for the night, check it all about 3 times tomorrow, then drill the rear spar holes.
Dave Chapdelaine
N821RV (reserved)
Fuselage
www.davesrv7.com
web site not updated frequently---I'm building
Who am I kidding? It's never gonna be updated again, lol. Been so long I forgot how
N821RV (reserved)
Fuselage
www.davesrv7.com
web site not updated frequently---I'm building
Who am I kidding? It's never gonna be updated again, lol. Been so long I forgot how