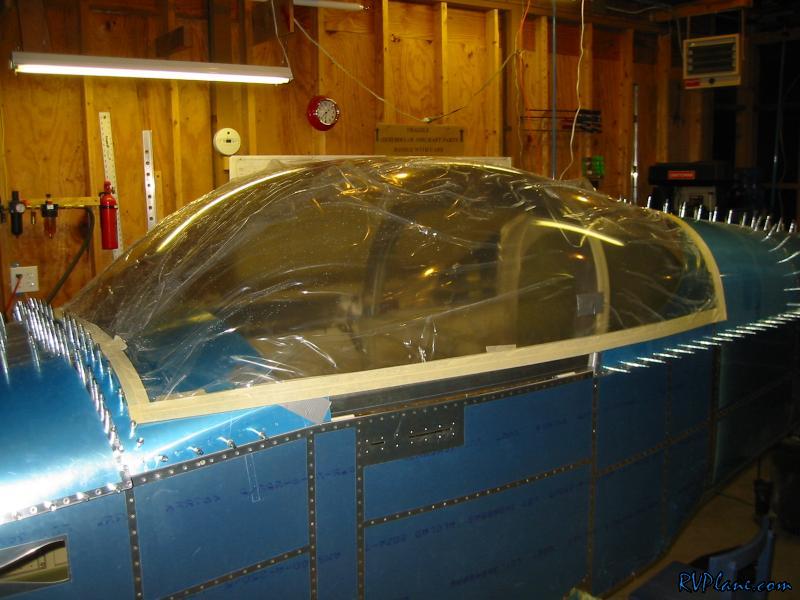
It really isn't a big deal do the canopy. It's only one of, if not the, most fragile parts to work with but there are many more things more difficult to do. For me it became an issue of working some off the sides then a little off the front and so on and so on, each time putting it back on and checking the fit then removing it again. It just takes time and care. The challenge for me was to get the canopy to kiss the frame in order not to over strain the plexi ever. I can see from your pictures you have a ways to go. Wicked Stick at one point showed us Spray Lat from Spruce. It's a great product and if you use it will help out with making the canopy an overall good experience. That sheet plastic on the canopy is a real drag to deal with.
Today I found no excuse not to make the big cut. Man, I am glad this is behind me. One less "boogeyman" to worry about. The canopy still needs a TON of trimming, but this was a big step nonetheless. It is much less awkward to handle the canopy now it is in two smaller manageable pieces.
Time for a beer!
Mike Bullock http://www.rvplane.com RV-7 | Superior IO-360 | Whirlwind 200RV Garmin GTN650 | GRT Dual Sport SX EFIS
Status: FLYING!
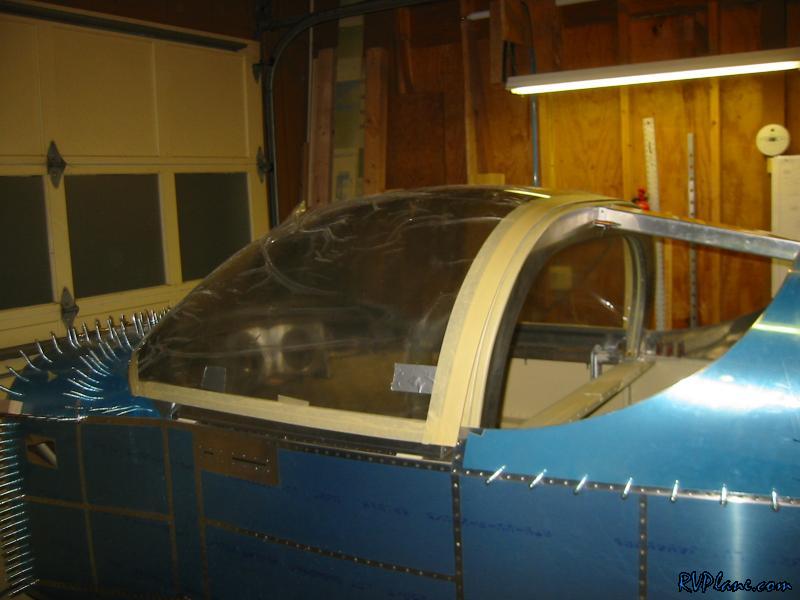
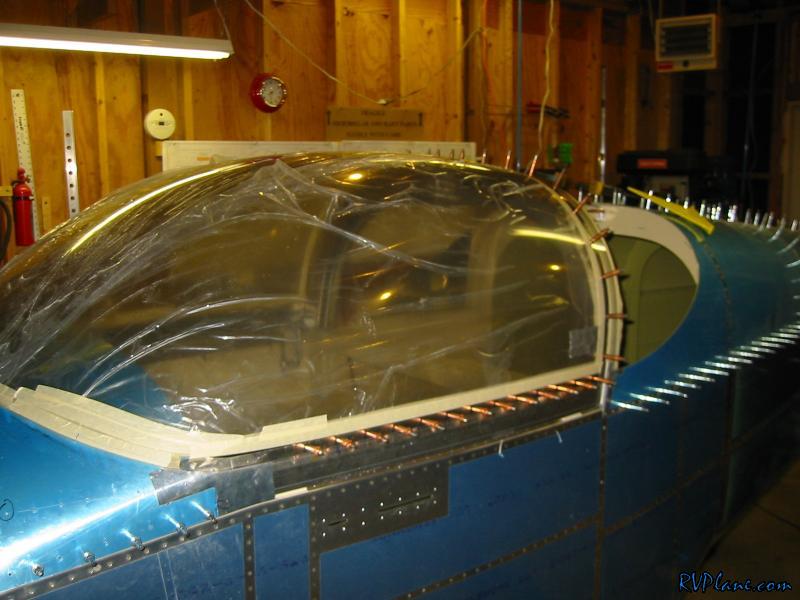
So tonight I was hell bent on cutting the sides of the canopy and getting the front transition nailed down. The sides were easy to cut, but I left a little meat on them to make a final cut once everything is final trimmed. Next was onto working on the transition from the front to the sides. I was freaked out thinking I could really mess things up and end up with a nasty gap between the skin and the canopy. However, the opposite was true. The more I trimmed, the better the fit got - it sucked down the gap that I had to nothing! Here is a close up of what the "close to final" trim looks like for you RV-7 tip-up guys that haven't reached this point. I would of loved to see another close up like this on another builders site to know what it should of looked like so I didn't need to go through a bunch of iterations to get here.
Hopefully tomorrow I will get the "dog ears" cut to the final size and think about drillin' this sucka. Wait, am I allowed to drill with all you SikaFlex cult members out there?
Mike Bullock http://www.rvplane.com RV-7 | Superior IO-360 | Whirlwind 200RV Garmin GTN650 | GRT Dual Sport SX EFIS
Status: FLYING!
smithhb wrote:Mike, lookin' good! What is your technique for marking the smooth radius prior to cutting? Are you judging each cut decision by eye?
Bret-
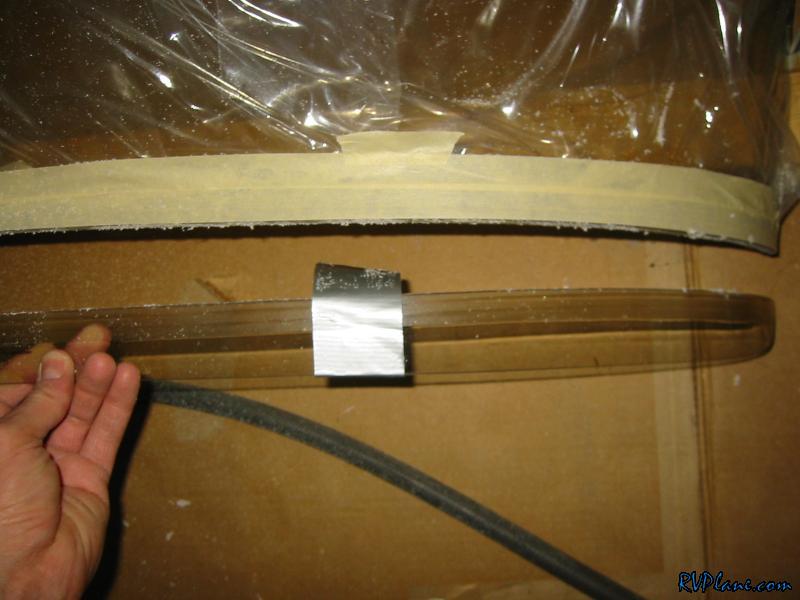
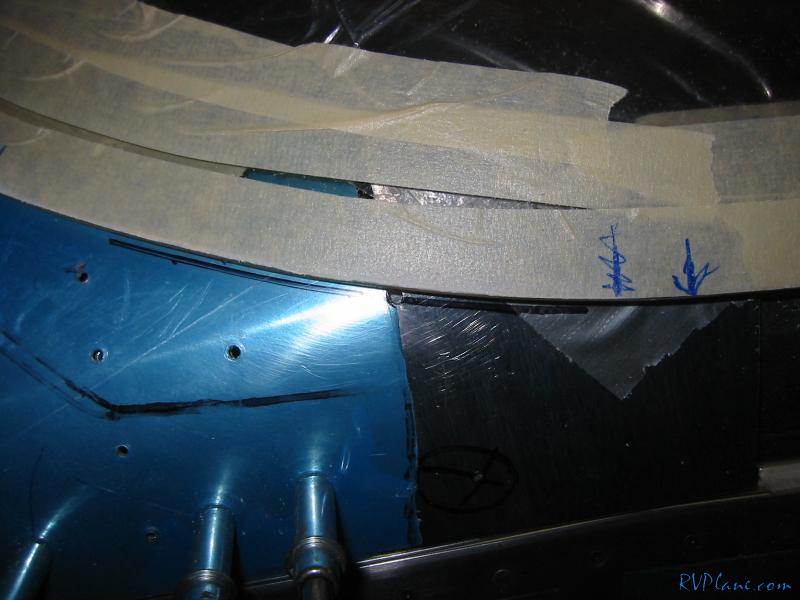
Yeah, each marking is more or less by eye. I do try my best to make each side symmetrical by measuring the distance between the prepunched holes on the skin to the proposed cut line. Using masking tape to mark the cut lines really helps out to make smooth transitions. Its tough to make a harsh transition when taping down masking tape and trying to avoid putting wrinkles on it!
Mike Bullock http://www.rvplane.com RV-7 | Superior IO-360 | Whirlwind 200RV Garmin GTN650 | GRT Dual Sport SX EFIS
Status: FLYING!
Last night I finally got the ()()'s to drill the forward canopy to the frame. Of course, it ended up being a total non event. Feels great having this behind me. Time to move forward with the aft canopy, and then the real fun start!
Mike Bullock http://www.rvplane.com RV-7 | Superior IO-360 | Whirlwind 200RV Garmin GTN650 | GRT Dual Sport SX EFIS
Status: FLYING!